How to choose between 100W and 400W solar modules in 6 steps
Assess your energy needs in kWh, then calculate the required system size. A 400W panel generates ~1.6 kWh daily, so you'd need four 100W panels for similar output, requiring more space and wiring. Consider your roof area and budget, as higher-wattage panels are more space-efficient but have a higher upfront cost per unit.
Check Your Roof's Size
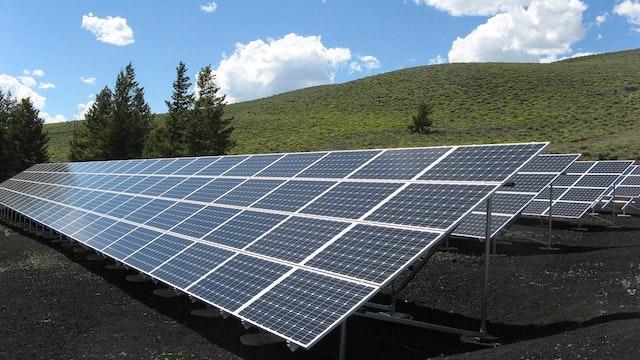
Before you get swept up by the raw power of a 400W panel, the first and most practical step is to see if it actually fits on your roof. You might be surprised to know that a typical 400W panel measures around ~2.2m x 1.1m, requiring about 2.4 m² of clear space for just one module. In contrast, a standard 100W panel is far more compact at roughly ~1.1m x 0.6m, needing only ~0.66 m². This size difference is the single biggest factor that will dictate your choice, as it directly impacts your system's total energy output and your installation options.
The physical dimensions of solar panels are just the start. You must also account for mandatory spacing for maintenance, airflow, and to comply with local fire codes. These setbacks can reduce your usable area by 15-20%.
Module Type | Power (W) | Panel Area (m²) | Usable Area After 20% Setback (m²) | Max # of Panels | Estimated Total System Size |
100W | 100 | 0.66 | 16 | ~24 panels | ~2,400 Watts |
400W | 400 | 2.4 | 16 | ~6 panels | ~2,400 Watts |
As the table shows, you can achieve the same total system size (~2,400W) with either choice. However, the installation logistics are vastly different. Fitting 24 smaller panels offers more flexibility to work around vents, chimneys, and roof irregularities. It allows you to maximize every inch of an oddly shaped roof.
Installing 6 large panels is a much faster process, potentially cutting labor time by up to 30%. But there's a catch: their size makes them incredibly rigid. If your roof has multiple obstructions, you might only be able to fit 4 panels, yielding a 1,600W system—a 33% reduction in potential power output compared to the smaller-panel scenario.
Compare Cost Per Watt
A 100W panel might retail for around 100 ,while a 400 W panel can cost 280 or more. This initial comparison seems to favor the smaller module. However, the true measure of value in solar isn't the price per panel; it's the price per watt ($/W), which reveals the actual cost of generating energy. This metric factors in the panel's efficiency and power density, allowing for a direct apples-to-apples comparison regardless of size. Ignoring this can lead to overspending up to 25% more for the same overall system capacity.
To calculate /W,simply divide the panel′s price by its powerrating.Using our examples: the 100 W panel costs 100 / 100W = 1.00 perwatt .The 400 W panel costs 280 / 400W = $0.70 per watt. Immediately, the 400W panel offers a 30% lower cost for the raw energy-producing hardware. This fundamental efficiency in manufacturing and materials is a major driver for the industry's shift towards higher-wattage modules.
But the hardware is only 55-60% of the total installed system cost. Soft costs like labor, permitting, and electrical modules (inverters, racking) form a significant portion. This is where larger panels create substantial savings. Installing a 6 kW system requires only fifteen 400W panels but sixty 100W panels. The labor for mounting, wiring, and connecting sixty panels is vastly higher. We estimate a crew can install 8-10 large panels per day versus 15-20 small panels in the same 8-hour period due to the reduced number of connections and mounting points. This ~40% reduction in labor time translates directly into a lower final invoice.
Furthermore, balance-of-system (BOS) costs are lower. You need one set of racking rails per panel, not per watt. The same goes for wiring connections and conduit. The reduced physical footprint of a high-wattage array can also lower roofing material costs and complexity. When all these factors are combined, the total installed $/W for a system using 400W panels can be 15-20% lower than an equivalent system built with 100W modules. This lower upfront cost directly improves your return on investment (ROI) and shortens the payback period by 1-3 years, making the higher-power option the financially superior choice in the vast majority of cases.
Evaluate Your Energy Needs
The average U.S. household consumes approximately 886 kilowatt-hours (kWh) per month, but this number can swing wildly from 500 kWh for a small apartment to over 1,200 kWh for a large home with electric vehicles. Installing a system that is too small leaves you reliant on the grid, while an oversized system represents a significant capital investment that may not offer the best return. Your past utility bills are the single most important data point for this step, providing a clear, personalized benchmark for your required energy production.
Your goal is to size a system that can offset a significant portion, say 80-100%, of your annual energy use. This starts by analyzing twelve months of utility bills to find your average monthly kWh usage, accounting for seasonal spikes in summer (AC) and winter (heating). For our example, let's use a home with a 900 kWh monthly average, aiming for a 95% offset.
Solar panels don't produce their maximum output constantly. Production is affected by daily sunlight hours, which vary by location. A key concept is the "peak sun hours" – the number of hours per day when sunlight intensity averages 1,000 watts per square meter. This number ranges from 3.5 hours in Seattle to over 6 hours in Phoenix.
The formula to calculate the required system size in kilowatts (kW) is:
Annual Energy Needs (kWh) ÷ (365 days × Peak Sun Hours × System Efficiency)
Assume our example home is in Denver, CO, with 4.5 peak sun hours and a system efficiency of 75% (accounting for inverter losses, dirt, and shading).
l Annual Energy Need: 900 kWh/month × 12 months = 10,800 kWh
l Required System Size: 10,800 kWh ÷ (365 × 4.5 × 0.75) ≈ 8.75 kW
Now, let's see how many panels are needed to build this 8.75 kW system.
Module Type | Power (W) | Quantity Needed | Total Surface Area (m²) | Estimated Annual Production (kWh) |
100W | 100 | 88 | ~58 m² | 10,800 |
400W | 400 | 22 | ~53 m² | 10,800 |
This table reveals a critical insight: while both systems produce the same annual energy, the 100W option requires 400% more panels and ~9% more roof space due to less efficient use of area and more space for wiring and mounting hardware. This makes it a non-starter for most homes with limited roof space.
Consider Future Expansion
Your energy needs today are not what they will be in five or ten years. The average household adds 2-3 major electricity-consuming devices over a decade, with electric vehicle (EV) adoption being the single biggest driver. Adding one EV can increase your household energy consumption by 30% or more, requiring an additional 3-4 kW of solar capacity. Furthermore, panel efficiency has been improving at a steady rate of ~0.5% per year, meaning newer models will be more powerful for their size. Choosing a system architecture today that is deliberately designed for future expansion can save you thousands of dollars and significant hassle down the line, protecting your investment from premature obsolescence.
The biggest constraint for expansion is rarely your roof space; it's your inverter's maximum capacity. Most inverters are sized to match the initial array, with a 10-20% overhead buffer. For example, an 8.8 kW system might use a 9.6 kW inverter. If you later want to add 2 kW of panels, you'd need to replace the inverter entirely—a project that can cost 1,500−2,500 including labor, negating the financial benefits of expansion for several years.
Pro Tip: A key strategy is to intentionally oversize your inverter from the start. Installing a 9.6 kW inverter for an initial 7 kW array of 400W panels may add 300−500 to the upfront cost, but it reserves ~2.6 kW of capacity for future panels. This small upfront premium is far cheaper than a full inverter replacement later.
The second constraint is physical layout. Filling every square inch of your roof with panels during the initial installation leaves zero room for expansion. This is a critical advantage of starting with higher-wattage modules.
l Scenario A (400W Panels): Your initial 7 kW system uses 18 panels, occupying ~43 m². You deliberately leave one clear, south-facing section of ~5 m². In 3 years, you can add two more 440W panels (assuming future efficiency gains) to create a ~7.88 kW system, leveraging your pre-sized inverter.
l Scenario B (100W Panels): Your initial 7 kW system uses 70 panels, covering nearly every available surface. There is no logical, safe space to add even one more panel without a complex and costly re-structuring of the entire array.
The higher-wattage strategy provides inherent flexibility. The physical density of power means each new panel you add delivers a much greater boost in capacity. Adding a single 400W panel in the future is equivalent to adding four 100W panels, which would require four times the mounting hardware, wiring, and labor time.
Review Local Weather Patterns
Two identical 8 kW systems will produce vastly different annual energy outputs based on their location: one in sun-drenched Arizona might generate over 14,000 kWh per year, while another in cloudy Washington state may struggle to reach 9,500 kWh. Beyond just total sun hours, factors like peak summer temperatures that reduce panel efficiency, frequent overcast days that diminish light intensity, and even light snowfall that can completely block production must be analyzed. Choosing a module that is resilient and optimized for your specific weather patterns is crucial for maximizing your energy yield and financial return.
Solar panels are rated at Standard Test Conditions (STC): 25°C cell temperature, 1000W/m² irradiance. Real-world conditions are never this perfect. The two most critical weather factors are temperature and diffuse light conditions.
1. Temperature Coefficient and Heat Loss
Solar panel efficiency decreases as temperature rises. This performance loss is quantified by the Temperature Coefficient of Pmax, typically around -0.3% to -0.5% per degree Celsius above 25°C. On a 95°F (35°C) day, rooftop panel temperatures can easily reach 65-70°C (149-158°F), a 40-45°C increase over STC.
l For a panel with a -0.4%/°C coefficient, this temperature rise causes a 16-18% drop in power output.
l A 400W panel would, in this real-world scenario, only be outputting about ~330W during the peak heat of the afternoon.
This is a crucial differentiator. Higher-wattage panels often use newer cell technology (like half-cut cells) that may have a slightly better (lower) temperature coefficient, for example, -0.34%/°C vs. an older 100W panel's -0.45%/°C. In hot climates, this ~0.11%/°C advantage translates to ~4.4% more power on that same scorching day, meaning the 400W panel outputs ~345W versus the 100W panel's ~82W (from a 100W rating). The high-wattage panel's technological edge mitigates weather-related losses more effectively.
2. Low-Light and Diffuse Light Performance
Not all sunlight is direct. Overcast skies create diffuse light. Panel performance in these conditions is determined by cell technology and the anti-reflective coating quality. Modern mono-crystalline PERC cells (common in 400W+ panels) have a significantly higher low-light output than older poly-crystalline cells (common in budget 100W panels).
Weather Scenario | 100W Poly Panel (Typical) | 400W Mono PERC Panel (Typical) | Annual Impact |
Full Sun (1000W/m²) | 100W | 400W | Baseline |
Cloudy Day (300W/m²) | ~22W (22% efficiency) | ~132W (33% efficiency) | 500% more power harvest |
Light Snow Cover | 0W (fully blocked) | May still generate 5-10% power if cells are partially exposed. | Prevents total production loss. |
The data shows that in regions with 150+ cloudy days per year or frequent morning fog, the advanced technology in high-wattage panels doesn't just add power—it drastically reduces the frequency and depth of production dips. Over a year, this can lead to a 5-10% higher total energy yield compared to a system of the same STC rating using older, less efficient module technology.
For areas with high hail risk, check the panel's hail rating. A 400W panel rated to withstand 25mm hail at 23 m/s impact offers significantly better durability than a panel with a lower rating. Your local weather doesn't just influence how much energy you produce; it determines which panel's underlying technology will work hardest for you.
Assess Installation Logistics
Installation isn't just about bolting panels down; it involves weight limits, crew safety, wiring complexity, and local regulations. A single 400W panel can weigh 25 kg (55 lbs), while a 100W panel is closer to 7 kg (15 lbs). This 3.5x weight difference per unit directly impacts structural requirements and handling. Furthermore, the physical maneuverability of large-format panels is a major hurdle—navigating a 2.2m x 1.1m panel up a ladder, around corners, and onto a steeply pitched roof requires multiple installers and specialized equipment, adding time and potential risk that directly influences the final installation quote.
Structural and Handling Factors
The weight and size of panels directly affect both the roof's load-bearing capacity and the crew's ability to install them safely. A typical composite shingle roof is designed for a live load of about 20 lbs per square foot and a dead load of 10-15 lbs/sq ft. You must add the panel weight to the mounting system weight.
Installation Factor | 100W Module (7 kg / 0.66 m²) | 400W Module (25 kg / 2.4 m²) | Impact & Consideration |
Weight per Unit | 7 kg / 15 lbs | 25 kg / 55 lbs | Large panels may require 2-3 person handling; small panels can be handled by 1 person. |
Weight per m² | ~11.1 kg/m² | ~10.4 kg/m² | Surprisingly, weight density is similar; total system weight is comparable. |
Roof Access | Easy to carry up ladder singly. | Requires a lift assist system or multiple installers on roof, slowing setup by 15-20%. | Adds ~300−500 to labor cost for a large array due to extra time and equipment. |
Installation Speed | 15-20 panels mounted per 8-hour day. | 8-12 panels mounted per 8-hour day. | Fewer total units for the same power means ~30% faster overall project completion for high-wattage systems. |
Wiring and Electrical Logistics
A system using sixty 100W panels requires managing 60 MC4 connectors, 60 mounting points, and potentially 5-6 long strings of wiring across the roof. This complexity increases the points of potential failure and the time required for quality checks. Conversely, a system with fifteen 400W panels needs only 15 connectors and 15 mounting points, often configured in just 2-3 strings. This reduces wiring time by ~40% and minimizes future maintenance points. However, the higher current (Imp) and voltage (Vmp) of the 400W panels require careful string sizing to stay within the inverter's maximum input voltage (e.g., 600V) and current (e.g., 15A) limits. Mismatching here can force the use of a more expensive inverter.

Regulatory and Permitting Hurdles
Some local fire codes mandate specific setback requirements (e.g., 1.2m pathways along the roof ridge and edges) for emergency access. The physical size of the panel influences how easily these layouts can be achieved. A large panel might not fit into a small, code-compliant section, whereas a smaller panel could be oriented to maximize power in that same space. Furthermore, some Homeowners Associations (HOAs) have rules against visible solar panels from the street. The smaller footprint of a high-wattage array might be easier to position on a rear roof plane, simplifying HOA approval by ~80% compared to a sprawling array of small panels.