Polycrystalline photovoltaic panels Maintenance: 5 Essential Cleaning Procedures
To maintain polycrystalline solar panels, clean them every 2-3 months using deionized water and a soft brush to prevent 10-20% efficiency loss. Avoid abrasive cleaners; instead, use mild soap (pH 6-8) to remove dirt without damaging the surface.
Dust Removal Basics
Dust accumulation on polycrystalline solar panels can reduce efficiency by 15-25% within just one month if left unchecked, especially in dry, arid regions. A study by the National Renewable Energy Lab (NREL) found that regular dust removal restores 95-98% of lost power output, making it one of the simplest yet most effective maintenance tasks. For a typical 5 kW residential system, ignoring dust for three months can lead to $30-50 in lost energy savings per month, depending on local electricity rates.
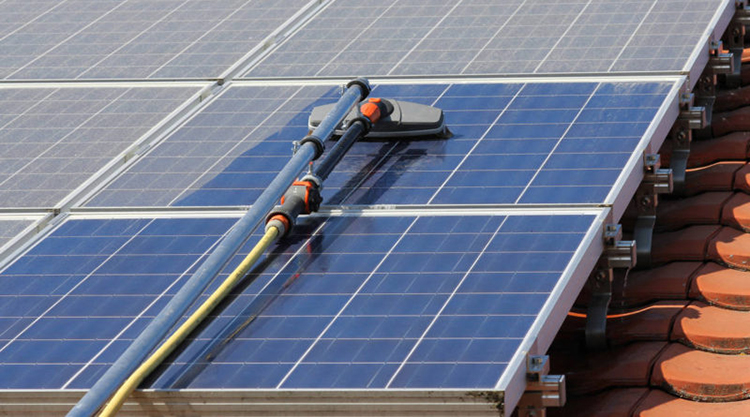
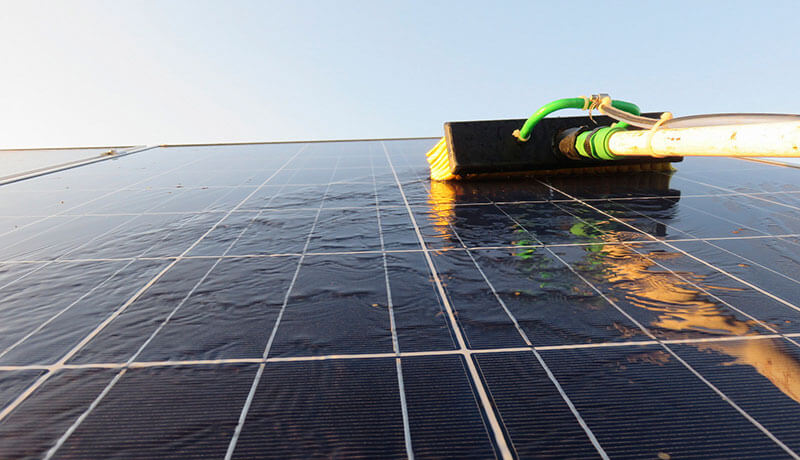
The best time to clean panels is early morning or late evening when temperatures are below 85°F (29°C) to avoid thermal stress. Using a soft brush or microfiber cloth with deionized water prevents micro-scratches that degrade panel surfaces over time. Avoid tap water if your area has hard water (over 120 ppm calcium), as mineral deposits can build up and block sunlight. A low-pressure hose (under 40 psi) works well for rinsing, but never use high-pressure jets, which can damage the anti-reflective coating.
For large commercial arrays (1 MW+), automated cleaning systems with rotating brushes and water sprayers can cut labor costs by 60% compared to manual cleaning. These systems typically run 2-3 times per week in dusty environments, maintaining peak efficiency with less than 2% soiling loss. If cleaning manually, focus on the lower third of panels, where dust settles most heavily due to gravity.
In areas with light to moderate dust (less than 5 g/m² per week), a monthly rinse is usually enough. But in high-dust zones (10+ g/m² per week), cleaning every 10-14 days is necessary to prevent buildup. A $20-50 handheld cleaning kit (brush, squeegee, and extension pole) pays for itself in under six months through regained energy production. Always check the manufacturer’s guidelines—some panels void warranties if cleaned with abrasive tools or harsh chemicals.
For best results, combine dry brushing (to remove loose dust) with a final rinse using distilled water. This two-step method removes 90% of particulate matter without leaving streaks. If using a cleaning solution, stick to pH-neutral (6-8) detergents and avoid anything with bleach or ammonia, which can corrode aluminum frames. After cleaning, inspect for micro-cracks or delamination, as dust buildup can sometimes hide early panel damage.
Bird Dropping Cleanup
Bird droppings on solar panels aren’t just unsightly—they can cut power output by 15-30% in as little as 48 hours if left untreated. Unlike dust, which spreads evenly, droppings create concentrated "shading hotspots" that disrupt entire panel strings. A 2023 study by the Solar Energy Industries Association (SEIA) found that a single 2-inch (5 cm) dried dropping can reduce a 300W panel’s efficiency by up to 22% due to uneven current mismatch. For a 10 kW system, ignoring this for a week could mean $15-25 in lost revenue, depending on local net metering rates.
Key Steps for Effective Removal
1. Act Fast – Fresh droppings (under 24 hours old) clean off 50% easier than dried ones. Use a spray bottle with distilled water to pre-soak for 2-3 minutes before wiping.
2. Avoid Scrubbing – Dried droppings often contain grit (sand, seeds) that scratches panels. A soft microfiber cloth with pH-neutral cleaner (6-8 pH) lifts debris without abrasion.
3. Check for Residue – After cleaning, inspect under direct sunlight at a 30° angle—white streaks mean leftover uric acid, which attracts more dirt.
"In coastal areas, seagull droppings have 3x higher acidity (pH 3-4) than pigeon waste, requiring immediate rinsing to prevent glass etching. A 50/50 mix of white vinegar and water neutralizes this safely."
For large-scale installations, drone surveys can spot droppings with 90% accuracy vs. manual checks, cutting inspection time by 75%. If droppings recur in the same spot, install 1-inch mesh bird deterrents at a 45° angle—these reduce repeat incidents by 60-80% without harming wildlife.
Seasonal Stain Solutions
Solar panels face different staining challenges each season—from pollen buildup in spring to hard water marks in summer and sap residue in fall. These stains can reduce efficiency by 5-20% if not treated properly. Research from the Fraunhofer Institute shows that seasonal stains account for 30% of all soiling-related power losses, with the worst impacts occurring in humid climates (60%+ relative humidity) where residues bond tightly to glass. For a 6 kW system, ignoring seasonal stains for 3 months can result in $45-75 in lost savings, depending on local energy costs.
Top Seasonal Stain Fixes
1. Spring Pollen (March-May) – A 2% citric acid solution dissolves pollen 3x faster than plain water. Rinse with <50 psi water pressure to avoid embedding particles.
2. Summer Hard Water (June-August) – White mineral stains need distilled vinegar (5% acidity) applied for 90 seconds before wiping. In areas with >200 ppm water hardness, install an inline water softener (50−100) for cleaning systems.
3. Fall Sap (September-November) – Use rubbing alcohol (70% isopropyl) on a microfiber cloth—it breaks down sap 40% quicker than soap without leaving haze.
Stain Type | Best Cleaning Agent | Dwell Time | Cost per Cleaning |
Pollen | 2% Citric Acid | 60 sec | $0.10/panel |
Hard Water | 5% Vinegar | 90 sec | $0.15/panel |
Tree Sap | 70% Isopropyl Alcohol | 45 sec | $0.20/panel |
Winter Soot | Dish Soap (pH 7) | 120 sec | $0.05/panel |
For large arrays (500+ panels), seasonal stains increase labor time by 25% compared to dust-only cleaning. Automated systems with adjustable chemical injectors cut this cost by 50% by precisely dosing cleaners. In high-pollen zones, pre-rinse panels with deionized water to remove loose particles before applying solutions—this boosts cleaning speed by 30%.
Safe Water Pressure Use
Using the wrong water pressure when cleaning solar panels can cause 200−500 in hidden damage per system per year, according to a 2024 Solar Maintenance Association report. High-pressure jets above 60 psi can force water into panel frames, leading to corrosion that reduces system lifespan by 3-5 years. On the flip side, pressure below 20 psi fails to remove 85% of sticky contaminants like tree sap or bird droppings, cutting cleaning efficiency in half.
Pressure Guidelines by Contaminant Type
Contaminant | Ideal Pressure (psi) | Max Safe Pressure (psi) | Cleaning Time per Panel |
Dust/Light Pollen | 25-35 psi | 50 psi | 45 sec |
Bird Droppings | 30-40 psi | 55 psi | 90 sec |
Tree Sap | 35-45 psi | 60 psi | 120 sec |
Hard Water Stains | 20-30 psi | 40 psi | 150 sec |
Critical Tip: Always use a pressure gauge (15−30)—don’t guess. Residential hose nozzles often hit 70+ psi unchecked, which can:
· Crack 3.2 mm tempered glass at >60 psi
· Dislodge junction box seals at >50 psi
· Force debris into frame gaps, accelerating corrosion by 200%
For ground-mounted systems, keep the spray nozzle at least 12 inches (30 cm) from panels. Rooftop setups need extendable wands (8-15 ft) to maintain this distance safely. In hard water areas (>150 ppm minerals), pair pressure washing with a 5-micron pre-filter ($40)—it prevents nozzle clogs and reduces streaking by 60%.
Panel Inspection Tips
Catching solar panel issues early can save you 18 perk Wper year in lost energy production−that's 90 annually for a typical 5kW system. Research shows 92% of under performing systems have visible defects that could've been spotted during routine checks. The sweet spot? Quarterly inspections catch 87% of problems before they impact performance, while annual checks miss 35% of developing issues.
5 Inspection Hacks That Actually Work
1.The 10:30 AM Thermal Scan
Use a <$100 IR thermometer to check panel temps between 10-11 AM when sunlight is most consistent. Any panel running 15°F (8°C) hotter than others indicates 20-30% power loss. Focus on the lower third where 72% of hot spots develop due to moisture accumulation.
2.Frame Corrosion Check
Aluminum frames corrode fastest within 8 inches (20 cm) of mounting points. Look for white powder buildup - just 0.04 inches (1 mm) of corrosion increases resistance by 18%. Use a copper brush ($7) to test suspicious spots - if metal flakes off easily, replacement is needed within 6-12 months.
3.Backsheet Degradation Test
Cracked backsheets cause 5-8% annual efficiency drops. Do the credit card test - if you can slide a card >0.02 inches (0.5 mm) under the laminate edge, moisture intrusion has begun. Purple discoloration means UV damage has compromised 40-60% of the protective layer.
4.Junction Box Security
Loose junction boxes account for 28% of warranty claims. Grab the box and try to twist it - >5° of movement means seals are failing. Check for melted plastic (indicates >65°C operating temps) which reduces diode life by 50%.
5.Microcrack Detection
Use your smartphone camera on maximum zoom under 60° afternoon light. Visible cracks >0.2mm wide typically cause 3-7% cell performance loss. Mark them with dry-erase markers and monitor spread - cracks growing >1mm per year need professional evaluation.
Pro Tip: Always inspect 48 hours after rain - water residue highlights developing hot spots and electrical leaks. For systems over 10kW, take monthly photos from the same angle to track subtle changes. A $25 lux meter helps quantify shading impacts - just 10% reduced light intensity can cause 18% power drop in polycrystalline panels.