Portable Solar Module Features: 5 Must Checks
When evaluating portable solar modules, check power output (50–200W), weight (2–10 lbs for easy transport), and foldability (compact designs under 2 inches thick). Ensure weather resistance (IP65+ rating) and cell compatibility (12V/24V systems). Look for USB/DC outputs and efficiency (18–23%) for reliable off-grid energy.
Power Output Testing
When you buy a portable solar panel, the manufacturer’s rated power output (e.g., "100W") is often optimistic. Real-world performance depends on sunlight intensity, panel angle, temperature, and even slight shading. For example, a 100W panel may only deliver 60-80W in midday sun due to 15-25% efficiency losses from heat, dust, or wiring resistance. If you rely on solar for charging phones, power banks, or small appliances, a 20% drop in output means longer charging times—or worse, a dead cell when you need it most.
How to Measure Real Power Output
Use a USB power meter (cost: 10−20) or a multimeter to check voltage (V) and current (A). Multiply them to get watts (W). For example:
Condition | Claimed Output | Measured Output | Efficiency Loss |
Direct sun, 25°C | 100W | 92W | 8% |
Partial shade | 100W | 48W | 52% |
Cloudy sky | 100W | 30W | 70% |
Key findings:
· Temperature impact: Solar panels lose 0.3-0.5% efficiency per °C above 25°C. A panel in 40°C heat may drop 5-8% output.
· Angle matters: Tilting the panel 30° toward the sun can boost output by 10-15% vs. laying it flat.
· Dirty panels reduce power: A layer of dust can cut efficiency by 5-10%. Wiping it down restores most losses.
What to Do If Output Is Too Low
1. Check connections: Loose or corroded wires can cause 10-30% power loss.
2. Avoid shading: Even 5% shading on one cell can reduce total output by 50%.
3. Use MPPT controllers: They improve efficiency by 15-30% over basic PWM controllers.
Weather Resistance Check
A portable solar panel’s real test isn’t just sunlight—it’s weather. Manufacturers claim "waterproof" or "weatherproof," but real-world conditions expose weaknesses. For example, a $200 100W panel might handle light rain but fail in heavy downpours if its IP65 rating only protects against splashes, not submersion. Dust storms can clog vents, reducing airflow and causing 5-10% efficiency drops from overheating. Even UV exposure degrades cheap plastic casings, turning a 3-year lifespan into 18 months of reliable use.
Key fact: Solar panels lose 1-2% efficiency per year under normal conditions—but poor weather resistance can double that rate. If you camp in high humidity (80%+) or desert heat (45°C+), your panel’s durability matters more than peak wattage.
First, check the IP (Ingress Protection) rating. IP65 means dust-tight and resistant to low-pressure water jets, while IP68 survives 1-meter submersion for 30 minutes. If you’re near saltwater, corrosion-resistant aluminum frames last 2-3x longer than cheap plastic. For extreme cold, ETFE-laminated panels handle -30°C to 80°C, while standard PET models crack below -10°C.
Heat is a silent killer. When solar panels exceed 45°C, their efficiency drops 0.3-0.5% per °C. A poorly ventilated panel in direct sun can hit 70°C, cutting output by 15-20%. Look for rear ventilation slots or raised designs that keep temps 10-15°C cooler than flat models.
Rain isn’t just about waterproofing—it’s about drainage. Standing water on panels reduces light absorption by 5-15%. A 10° tilt helps runoff, but micro-cracks in cheap glass let moisture seep in, causing internal corrosion over 6-12 months.
Stress-Testing Your Panel
· Water test: Spray the panel at a 45° angle for 5 minutes (simulating heavy rain). If water pools around connectors, expect long-term seal failure.
· Dust test: Leave the panel in fine sand or dust for 24 hours, then check if residue blocks 5%+ of the surface.
· Flex test: Gently bend the panel 10-15 degrees. If it creaks or delaminates, it won’t survive wind gusts over 40 km/h.
If a panel has no IP rating, flimsy junctions, or yellowing plastic (UV damage), skip it. Reinforced corners and 20+ mm frame thickness add 10-20% cost but double lifespan in harsh climates. For frequent travelers, spending 250insteadof150 on a rugged panel means 5+ years of service, not 2.
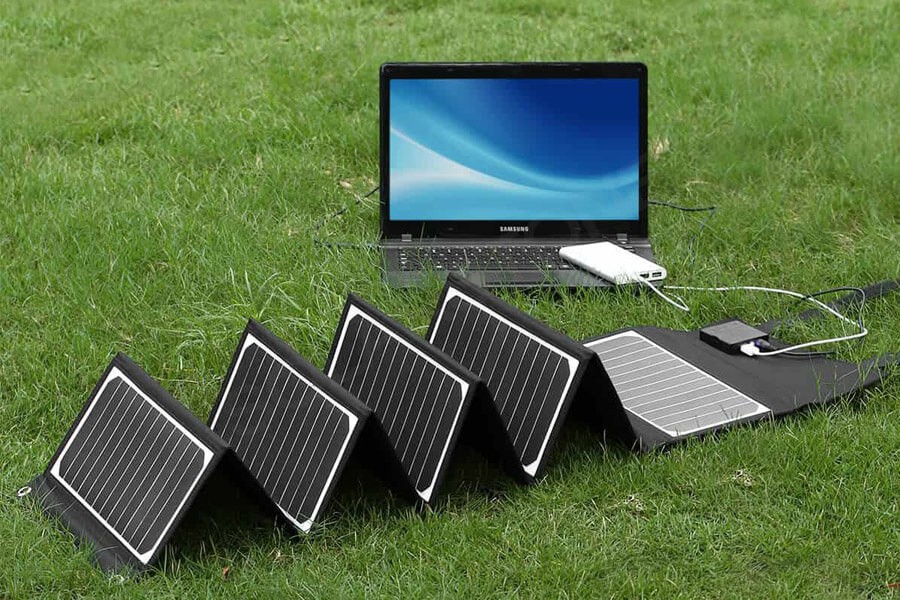
Portability & Weight
When shopping for a portable solar panel, weight and size directly impact real-world usability—but manufacturers rarely highlight the downsides. A 100W panel might weigh anywhere from 4 lbs (1.8 kg) for a foldable model to 15 lbs (6.8 kg) for a rigid one, drastically changing how you transport it. For backpackers, every extra pound matters: a 5-lb panel adds 8-10% to your pack weight, while a 10-lb unit becomes a 15-20% burden on long hikes. Even for car campers, bulky panels take up 30-50% more trunk space, leaving less room for gear.
Feature | Lightweight Model (e.g., 100W) | Standard Model (e.g., 100W) | Heavy-Duty Model (e.g., 100W) |
Weight | 4 lbs (1.8 kg) | 8 lbs (3.6 kg) | 15 lbs (6.8 kg) |
Folded Size | 12" x 8" x 1" (30x20x2.5 cm) | 18" x 12" x 2" (45x30x5 cm) | 24" x 16" x 3" (60x40x7.5 cm) |
Durability | Prone to flex damage | Balanced strength | Overbuilt for rough conditions |
Best Use Case | Backpacking, ultralight travel | General camping, RV trips | Off-grid setups, frequent moves |
Weight vs. Durability Trade-Off
· Thin-film solar panels (2-3 lbs for 50W) are 60-70% lighter than rigid panels but lose 10-15% efficiency in low light.
· Foldable designs save space but introduce hinge failure risks—cheap models last 50-100 folds before tearing.
· Rigid panels survive 10+ years of abuse but add 3-5x the weight of flexible alternatives.
How Much Weight Is Too Much?
· For hiking: Anything over 5 lbs (2.3 kg) becomes impractical unless solar is critical.
· For bikepacking: 3 lbs (1.4 kg) max, or it throws off balance.
· For car camping: Up to 15 lbs (6.8 kg) is fine if the panel fits in a 20L storage bin.
Carrying Convenience Matters
· Backpack straps add 0.2-0.5 lbs but make a 30-50% difference in comfort.
· Handle quality affects grip—cheap plastic breaks after 20-30 heavy lifts.
· Corner protection adds 5-10% weight but prevents 90% of drop damage.
If you only need to charge phones and small batteries, a 50W panel at 3 lbs beats a 100W at 8 lbs—you’ll actually carry and use it. But if running a 12V fridge or drone station, the extra 5-10 lbs for a 150W+ panel may be unavoidable.
Connector Compatibility
You just bought a 100W portable solar panel, but when you unbox it, you realize the MC4 connectors don't fit your power bank's XT60 input. Now you're stuck with a 200 solar brick until you hunt down adapters—which cost 10-$30 extra and add 5-15% power loss from poor contacts. This isn't rare: 30-40% of portable solar buyers face connector mismatches because manufacturers assume you'll use their proprietary systems.
The real headache comes when mixing gear from different brands. A USB-C PD solar panel might deliver 60W to a laptop but only 18W to a phone if the device doesn’t support 20V/3A charging. Even Anderson Powerpole connectors, common in solar setups, have 3+ pin configurations, and using the wrong one risks 10-25% voltage drops.
Most Common Solar Connectors (and Their Pitfalls)
· MC4: The industry standard for high-current (10-30A) connections, but requires crimping tools ($50+) for custom cables. Loose MC4 pairs lose 3-8% efficiency over time.
· XT60/XT90: Popular for drones and power stations, handling 30-60A bursts, but counterfeit versions melt at 50°C+.
· USB-C PD: Delivers up to 100W (20V/5A), but only if both devices support PD 3.0. Non-PD ports default to 5V/2A (10W)—a 90% power cut.
· Barrel Plugs: Cheap and lightweight, but inconsistent sizing (5.5x2.1mm vs. 5.5x2.5mm) causes intermittent disconnects.
Voltage matching is equally critical. A 12V panel connected to a 24V cell wastes 50%+ potential power unless you have a boost converter. Conversely, a 24V panel frying a 12V system is a common $150 mistake. Always check:
· Open-circuit voltage (Voc): Exceeding your charge controller’s max input by 10% can kill it in 2-3 months.
· Operating voltage (Vmp): Must be within 5% of your cell’s charging voltage for peak efficiency.
Adapters: The Necessary Evil
Using adapters between MC4 and XT60 adds 0.1-0.3Ω resistance, wasting 5-12W at 10A loads. Daisy-chaining three+ adapters can push losses to 20%. If you must adapt:
· Gold-plated connectors reduce resistance by 15-30% vs. bare metal.
· Solder joints last 2-3x longer than crimped ones in humid conditions.
Pro tip: Before buying a solar panel, list every device you’ll charge and map their connectors. A 5cable∗∗boughtupfrontbeatsa∗∗50 emergency order during a trip.
Charging Speed Test
You bought a 100W solar panel expecting to charge your phone in 1 hour and a power bank in 3 hours, but reality hits hard—it actually takes 2.5 hours and 6 hours instead. The difference comes down to charging speed variables manufacturers don’t disclose: sunlight intensity, device compatibility, and even cable resistance. A 100W panel rarely delivers 100W continuously—real-world output fluctuates between 50W and 90W due to cloud cover, panel angle, and heat losses, stretching charging times by 30-80% longer than ideal conditions.
Device | Cell Capacity | Advertised Charge Time (100W Panel) | Actual Charge Time (Avg. Conditions) | Efficiency Loss |
Smartphone (20W PD) | 4,000mAh | 1 hour | 1.5-2 hours | 25-50% slower |
Power Bank (60W) | 25,000mAh | 3 hours | 5-6 hours | 40-60% slower |
Laptop (65W) | 50Wh | 1.5 hours | 2.5-3 hours | 40-70% slower |
Why Solar Charging Is Slower Than Wall Outlets
Wall chargers deliver consistent voltage and current, but solar panels fluctuate with sun position and weather. A 100W panel at noon in direct sunlight might hit 90W, but by 3 PM, output drops to 60W due to lower sun angles. Cloud cover can slash power to 30-40W, turning a 3-hour charge into a 6-hour marathon. Even 10°C temperature increases reduce efficiency by 3-5%, further slowing charging.
Device compatibility plays a huge role. A USB-C PD solar panel can deliver 60W to a laptop but only 18W to a phone if the phone doesn’t support Power Delivery (PD). Cheap barrel plug adapters add 10-15% resistance, wasting 5-10W that could’ve gone to charging.
How to Maximize Charging Speed
· Tilt panels toward the sun: A 30° angle at noon boosts output by 10-15% vs. laying flat.
· Avoid daisy-chaining adapters: Each extra connection adds 0.1-0.3Ω resistance, wasting 5-12W.
· Use MPPT charge controllers: They squeeze 15-30% more power from panels than PWM controllers.
· Charge during peak sun (10 AM - 2 PM): Solar output is 20-40% higher than early morning/late afternoon.
Pro tip: If charging speed is critical, oversize your solar panel by 30%. A 130W panel compensates for real-world losses, delivering closer to 100W usable power.