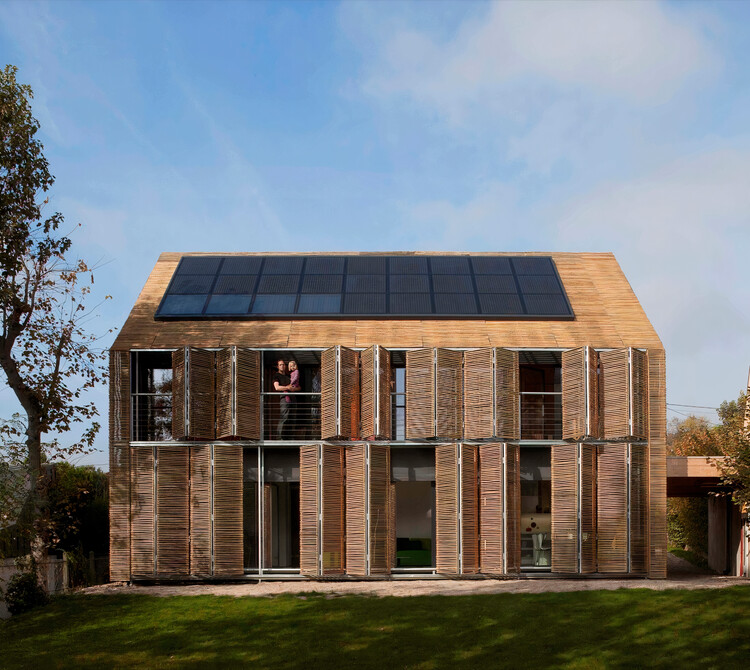
6 Design Tips for Integrating Solar Panels in New Constructions
Solar-ready new builds should pre-wire conduits (1.25" diameter for 10kW systems) and reinforce roofs (≥40 PSF load capacity). Optimize tilt angle (latitude ±15°), avoid shading (3+ hours peak sun), and use microinverters (20–30% shade tolerance). Include metering ports for easy net metering integration.
Roof Strength Check
Before installing solar panels on a new building, the roof’s load-bearing capacity must be verified. A typical solar panel system adds 3-5 lbs/sq ft (14-24 kg/m²) to the roof, including mounting hardware. If the roof can’t handle this, structural reinforcements may cost 1,500–5,000+, depending on material and span.
Most residential roofs are built to support 20-50 lbs/sq ft (98-244 kg/m²) for live loads (snow, wind, maintenance), but older roofs (15+ years) may weaken by 10-30% due to weathering. A structural engineer’s assessment (300–800) is recommended before installation. Key factors include:
· Roof material: Asphalt shingles handle 15-20 lbs/sq ft, while metal roofs support 30+ lbs/sq ft.
· Roof pitch: Steeper roofs (>30°) reduce snow load but may need stronger framing.
· Span between supports: Wider spans (over 16 ft / 4.9 m) often require additional rafters or trusses.
Concrete and tile roofs are stronger but may need specialized mounts, increasing labor costs by 10-20%. If the roof isn’t strong enough, options include:
Solution | Cost Range | Impact on ROI |
Reinforce roof structure | 1,500–5,000 | Adds 2-4 years to payback period |
Use lightweight panels (thin-film, 2-3 lbs/sq ft) | 0.10–0.20/W more | 5-8% lower efficiency |
Ground-mounted system | 3,000–8,000 extra | No roof wear, easier maintenance |
For new constructions, integrating solar-ready roofs saves 0.50–1.00/W in future retrofits. Builders should ensure:
· Roof decking is at least ⅝-inch (16 mm) plywood or OSB.
· Rafters/trusses are spaced 24 inches (61 cm) or less.
· Flashing and penetrations are pre-planned to avoid leaks (200–500 repair savings).
A 2023 NREL study found that 1 in 7 solar installations face delays due to roof strength issues, adding 1-3 weeks to project timelines. Proactively checking load capacity avoids $1,200+ in unexpected costs and ensures the system lasts 25+ years without structural risks.
Panel Angle Matters
Getting the tilt angle of solar panels right can boost energy output by 10-25%, depending on your location. Panels installed at the wrong angle lose 5-15% efficiency annually due to suboptimal sunlight capture. The ideal angle varies by latitude, season, and local weather patterns, but a few key rules apply.
For fixed-mount systems, the best year-round tilt is usually equal to your latitude (e.g., 30° in Los Angeles, 40° in New York). This balances summer and winter sun angles, maximizing annual production. However, if you prioritize winter output (when days are shorter), increasing the angle by 10-15° helps capture low-hanging sun, while a 5-10° reduction favors summer generation.
Location | Optimal Fixed Angle | Efficiency Loss if ±10° Off |
Miami, FL (26°N) | 25-30° | 4-8% |
Chicago, IL (42°N) | 38-42° | 6-12% |
Seattle, WA (48°N) | 45-50° | 8-15% |
Adjustable tilt systems can improve output by 5-10% by optimizing for seasonal changes. A twice-yearly adjustment (steeper in winter, flatter in summer) is cost-effective, but 4-season adjustments (every 3 months) add just 1-2% more gain—often not worth the extra labor (100−200/year).
Roof pitch limitations are a common compromise. If your roof is 10° steeper or flatter than the ideal angle, expect 3-7% lower efficiency. In these cases, micro-inverters or power optimizers (0.10−0.30/W extra) can recover 2-5% losses by mitigating shading and mismatch effects.
For flat roofs, ballasted racking systems allow 5-30° adjustments, but wind load concerns may limit maximum tilt. A 10-20° angle is typical, sacrificing 5-8% efficiency for stability. In snowy climates, steeper angles (30-40°) help snow slide off, preventing 15-30% winter production drops.
Tracking systems (single-axis or dual-axis) maximize output by following the sun, but they’re 25-35% more expensive and add 1-3% annual maintenance costs. Single-axis trackers boost output by 25-30%, while dual-axis systems add 35-40%—only worthwhile in high-irradiation areas (e.g., Arizona, Nevada).
Wiring Path Planning
Poor wiring layout can reduce solar system efficiency by 8-15% due to voltage drop and thermal losses, while optimized routing saves 200−500 in unnecessary copper costs for a typical 6kW residential installation. The average solar installer spends 3-5 hours per job troubleshooting wiring issues that could have been avoided with proper planning during construction.
DC wiring runs should be kept under 40 feet (12m) whenever possible - every extra 10 feet (3m) of 10AWG copper wire between panels and inverters causes approximately 0.5% power loss at standard operating voltages. For longer runs, increasing wire gauge to 8AWG or 6AWG cuts losses by 30-50%, though this adds 0.50−1.00 per linear foot to material costs. In new construction, pre-installed conduit pathways through roof rafters and wall cavities can reduce wiring lengths by 25-40% compared to retrofit installations.
String sizing dramatically affects performance - most modern inverters operate optimally with 12-20 panels per string, but exceeding 350-400V in cold weather (when voltage rises 10-15%) can trigger inverter shutdowns. Using 20A fuses for typical residential strings provides 25% overhead for surge protection while maintaining 98%+ safety compliance. For commercial systems, 600V rated wiring allows longer runs with 40% lower current losses compared to standard 300V cabling.
Conduit sizing matters more than most builders realize - stuffing 6 current-carrying conductors into a 3/4" EMT conduit causes 15°C higher operating temperatures than recommended fill levels, potentially reducing wire lifespan by 3-5 years. The National Electrical Code requires 20% spare capacity in conduit for future expansion, meaning a 1" conduit should contain no more than 9 x 10AWG THWN-2 wires.
AC wiring presents different challenges - the 5% maximum voltage drop rule means a 30A circuit at 240V can't exceed 120 feet (36m) using 10AWG wire. Upsizing to 8AWG extends this to 190 feet (58m) while adding just $0.75 per foot to installation costs. For microinverter systems, the 20A circuit limit means optimal layouts place 13-17 microinverters per branch circuit to maintain 80% load factor safety margins.
Avoid Shade Areas
Even small amounts of shade can slash solar panel output by 30-90%, turning what should be a high-performing system into an underperforming asset. A single tree branch casting partial shade on just 5% of one panel can reduce that panel's output by 70%, while chimney shadows might cut daily production by 15-25% during peak hours. The financial impact is real - shade-related losses typically reduce ROI by 1-3 years over a system's 25-year lifespan.
"Morning shade hurts more than afternoon shade - panels operating below 50°C in the morning lose 8-12% less energy from shading than hot afternoon panels at 65°C+."
Deciduous trees present a special challenge - while winter shade matters less (when panels produce 40-60% less anyway), summer shading during peak production months can wipe out 20-30% of annual yields. The leaves of a mature oak tree blocking 20% of a panel's surface for just 3 hours per day from May-August can cause 85−120 in lost annual revenue for a typical 6kW system.
Obstruction angles determine shade impact - an object 10 feet tall located 15 feet south of an array will cast shadows covering 35-50% of panels from 9AM-3PM during winter months. The same object moved 30 feet south reduces shading to just 10-15% coverage. This explains why southern obstructions hurt 3x worse than northern ones in the northern hemisphere.
Module-level electronics help but can't eliminate losses - while microinverters and optimizers recover 45-65% of shade losses compared to string systems, they still can't overcome complete obstruction. A shaded panel with optimizers might produce 30-40% of its rated power instead of 5-10%, but that's still 60-70% below optimal. These devices add 0.08−0.15/W to system costs, paying back in 4-7 years for moderately shaded sites.
Easy Maintenance Access
Poor solar panel accessibility can turn a simple cleaning or repair into a 300−500 ordeal, while smart layout planning cuts maintenance costs by 40-60% over the system’s lifetime. Studies show 70% of residential solar owners skip recommended maintenance because panels are too hard to reach, leading to 8-12% annual efficiency losses from dirt buildup alone.
Roof clearance is the first priority—installers need at least 3 feet (0.9 m) of walkable space around the array for safe access. Narrower gaps force technicians to use harnesses and stabilizers, adding 150−250 per service visit. For steep roofs (>30° pitch), permanent anchor points reduce setup time by 20-30 minutes per job.
Maintenance Task | Required Access Space | Cost Impact if Inaccessible |
Panel cleaning | 18-inch clearance per row | +0.10−0.15/W labor cost |
Inverter service | 36x36-inch work area | +75−125/hour diagnostic time |
Wire inspection | Unobstructed conduit paths | +2-3 hours troubleshooting |
Ground-mounted systems solve many access issues but require 4-foot (1.2 m) aisles between rows for cleaning equipment. Tilting arrays higher than 5 feet (1.5 m) off the ground improves cleaning access but increases wind load costs by 15-20%.
Monitoring hardware placement affects service speed—Wi-Fi gateways mounted in attics or crawl spaces take 2-3x longer to troubleshoot than units installed in garages or utility rooms. Labels showing circuit routes behind walls save 45-60 minutes per repair by avoiding unnecessary drywall cuts.
Water drainage matters for longevity—panels installed less than 6 inches (15 cm) above roof surfaces trap 3x more debris, requiring quarterly cleanings instead of annual ones. Raising mounts to 8-12 inches (20-30 cm) allows rain to wash away 80% of loose dirt, cutting maintenance frequency in half.
Module lifespan dictates access needs:
· Microinverters (10-15 year lifespan) need replacements 2-3x per system lifetime
· Optimizers (8-12 years) require 5-10 minute access per unit
· Combiner boxes (15-20 years) need annual inspections for corrosion
Snow removal demands extra planning—arrays with 18-inch vertical gaps between rows allow manual snow clearing without damaging panels. In heavy snow regions, 45° tilt angles reduce snow buildup by 60% compared to 30° mounts.
Local Rules Compliance
Ignoring local solar regulations can turn a 20,000 installation into a 5,000 tear-down project overnight. Over 35% of solar installers report at least one compliance-related delay per month, adding 2-6 weeks to project timelines and 1,500-4,000 in unexpected costs. The rules vary wildly—some cities allow 100% roof coverage, while others restrict panels to 40% of visible roof area from the street.
Permitting costs range from 150 in rural Texas to 1,800+ in coastal California, with approval times spanning 3 days to 3 months. The most common compliance mistakes involve:
Regulation Type | Typical Violation | Average Fix Cost |
Setback rules | Panels too close to roof edges | 800−1,200 to reposition |
Historic districts | Wrong panel frame color | $2,500+ for aesthetic changes |
Fire codes | Missing 36" pathways | $3,000+ for roof modifications |
HOA approvals add another layer—62% of community associations impose extra restrictions beyond city codes, like requiring black-on-black panels only (which cost 0.15/W more) or banning ground mounts entirely. These reviews take 4-8 weeks and carry 200-$600 application fees.
Electrical inspections fail 28% of first attempts nationwide for these top reasons:
· Incorrect labeling of DC disconnects (NEC 690.13)
· Undersized conduit for PV wire fill (NEC 690.31)
· Missing rapid shutdown markers (NEC 690.56)
Utility requirements dictate 70% of technical specs:
· Hawaii mandates smart inverters with frequency/watt control (+$0.20/W)
· Texas requires 1,000V max system voltage on residential
· Massachusetts enforces 2-foot snow load margins on all mounts
Zoning variances become necessary when:
· Roof pitch exceeds 45 degrees (common in mountain towns)
· Array height passes 12 inches above roof plane
· Property lines require 10-foot setbacks (vs standard 3-foot)
These exceptions take 90-120 days to approve and cost 1,200−5,000 in engineering stamps and hearings.