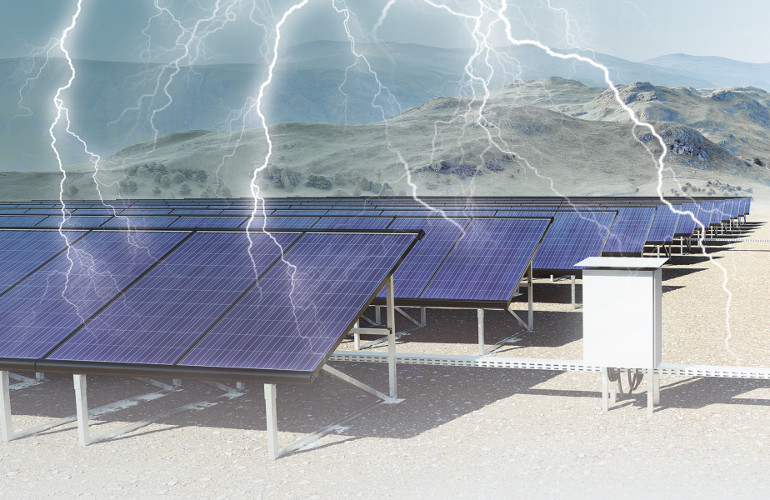
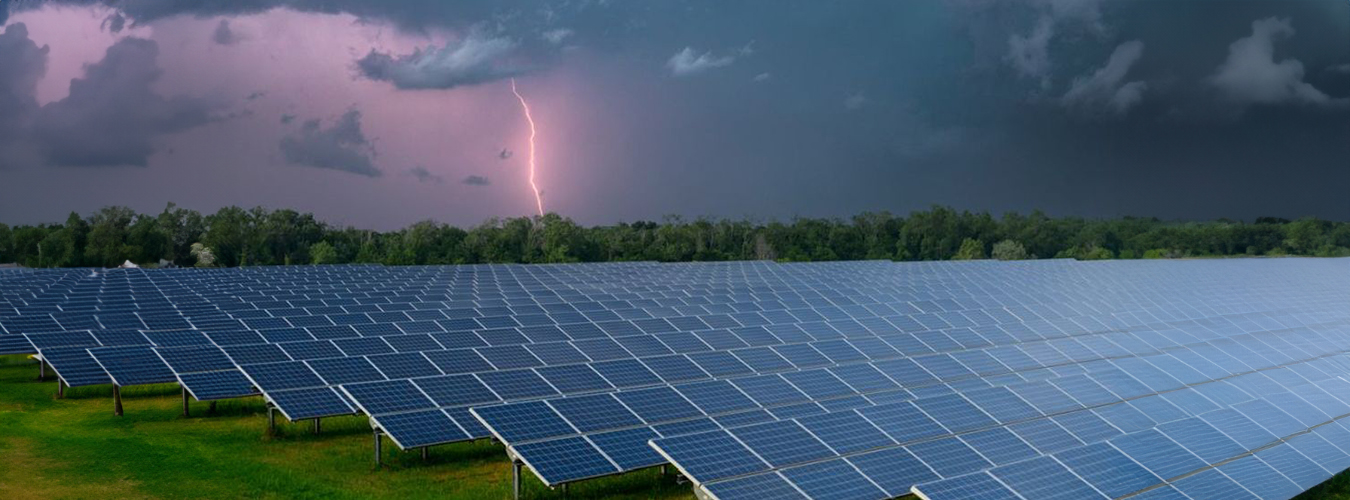
How can I protect my solar panels from lightning
Installing a secondary surge protector and controlling the grounding resistance within 10 ohms can guide a 30kA instantaneous current to the ground.
When combined with a lightning rod, it can reduce the risk of equipment damage by more than 80%.
External Protection
Installing Lightning Rods
According to the Rolling Sphere Method, residential or small-scale commercial photovoltaic systems are typically classified as Class III lightning protection buildings, with a corresponding rolling sphere radius ($R$) of 45 meters.
When installing an air terminal (lightning rod) with a height of 2.5 meters, its base coverage radius is approximately 4.3 meters (calculated using a 60° protection angle).
The peak current of a single lightning strike can reach 100kA to 200kA, which requires the air terminal to withstand instantaneous high temperatures of 30,000°C without melting.
To ensure the airport does not vibrate violently or break under Category 12 strong winds (wind speed approx. 32.7 m/s), the base bracket must be able to withstand a horizontal pressure of more than 500 N per square meter.
The vertical clearance height from the tip of the air terminal to the frame of the PV module should be maintained between 1.5 meters and 2.1 meters.
This ensures that when a lightning leader enters a 30-meter range, it is highly likely to be captured by the air terminal, preventing lightning waves from bypassing the tip and striking the tempered glass cover or backsheet.
External Lightning Protection Parameters | Standard Specifications and Quantified Indicators |
Rolling Sphere Design Radius | Set to 45 m for Class III and 30 m for Class II buildings. |
Air Terminal Diameter | Solid round steel ≥ 16 mm, or steel pipe wall thickness ≥ 2.5 mm. |
Instantaneous Temp Resistance | Material must maintain structural integrity at 2500°C. |
Protection Coverage Angle | Cone angle from tip to ground is recommended at 45° to 62°. |
Down-conductor Cross-section | Must use hot-dip galvanized round or flat steel > 50 mm². |
Instantaneous Ground Impedance | For high-frequency pulses, impulse grounding resistance should be < 10 Ω. |
Calculating Shading Angles
The shadow produced by a lightning rod with a diameter of 20 mm at a distance of 1 meter from the panel will cause the short-circuit current of the underlying solar cells to drop by 15% to 20%.
If the shadow persists for more than 30 minutes, the shaded cells will transform from power-generating units into power-consuming loads, creating local hot spots exceeding 80°C.
In the Northern Hemisphere, lightning rods should ideally be installed on the north side or the lateral edges of the PV array.
The horizontal distance between the installation position and the nearest cell should be greater than 0.5 times the height of the lightning rod.
In high-latitude regions (e.g., above 45°N), the solar elevation angle at noon in winter is only about 21.5°.
At this time, the shadow length of the lightning rod will be 2.5 times the pole height. Lateral offset must be increased; otherwise, it will cause an annual total power loss of 2.3% to 3.5%.
By using simulation software to calculate the shading trajectory for 8,760 hours a year, the annual revenue loss caused by shadows can be controlled within 0.5%.
Shading vs. Efficiency Loss | Data Performance and Impact Range |
Single Cell Shading Ratio | If shading reaches 10%, the power of that module string drops by ~30%. |
Hot Spot Temperature Rise | Shading > 15 mins leads to local temperature increases of 40°C - 60°C. |
Annual Revenue Reduction | Uncalculated rod installation may reduce generation by 150 - 300 kWh/year (for a 10 kW system). |
Bypass Diode Activation | Shading causes frequent daily diode actions, shortening lifespan by 20%. |
Installation Tolerance | A horizontal offset error > 10 cm can increase shading duration by 15%. |
Maintaining Adequate Separation
According to standard formulas, in a system with a single down-conductor and a total height of 10 meters, the air clearance between the air terminal and the module frame must not be less than 0.7 meters.
If solid insulating materials are used for support, the thickness must exceed 0.5 meters.
This is because during the discharge of lightning current, an induced voltage of several thousand volts per meter is generated on the down-conductor.
If the spacing is insufficient, the charge will penetrate the air and cause side-flashing, leading to an instantaneous surge of tens of thousands of volts into the 1,000V DC circuit, destroying all parallel inverter power transistors.
In rooftop distributed systems, if the spacing between the lightning belt and the bracket cannot meet the strict 0.5-meter requirement, equipotential bonding must be performed.
All metal brackets, rails, and air terminal bases must be forcibly connected using 16 mm² copper braided tape.
While this prevents arcing, it diverts 25% to 40% of the lightning current into the PV mounting system, necessitating the installation of higher-grade DC surge protective devices (SPDs).
Choosing Quality Materials
External lightning protection modules must withstand over 25 years of outdoor salt spray, acid rain, and high/low temperature cycles.
Air terminals are recommended to be made of 304 stainless steel or hot-dip galvanized carbon steel, with a galvanizing layer thickness of at least 65 μm (microns).
In highly corrosive environments within 10 kilometers of the coast, the annual corrosion rate of hot-dip galvanized material is approximately 2 μm.
If the thickness is insufficient, the material will lose 40% of its mechanical strength due to rust after 15 years, rendering it unable to resist typhoons.
Connection bolts should be M10 or M12 stainless steel, and the tightening torque must reach 25 Nm to 30 Nm.
This prevents electromagnetic repulsive forces from snapping the connection points apart when high-frequency lightning currents flow through points of high contact resistance.
The junction between the down-conductor and the grounding grid should be wrapped with anti-corrosion grease or heat-shrink tubing to prevent underground moisture from corroding the root of the conductor via capillary action.
Experimental data shows that for every 0.1 Ω increase in contact resistance, an additional 10 kV potential rise occurs during lightning passage, significantly increasing the risk of internal equipment breakdown.
Weather Resistance & Physical Indicators | Detailed Specifications |
Hot-dip Galvanized Thickness | Must be > 65 μm; must pass 240 h salt spray test without red rust. |
Bolt Tightening Torque | M10 bolts must reach 25 Nm (error within ±2 Nm). |
Conductivity Index | Copper connectors must have conductivity > 97% IACS. |
Thermal Cycle Stability | Resistance increases < 5% after cycling from -40°C to +85°C. |
Tensile Strength | Stainless steel rod tensile strength should be > 520 MPa. |
Anchoring the Base
For concrete roofs, the mass of the ballast concrete block should not be less than 40 kg, and the base area must reach 400 mm × 400 mm to prevent toppling in strong winds due to the lever principle, which could destroy PV modules valued at approximately $100 each.
If penetrative fixing is used, the drilling depth must penetrate the structural layer by more than 100 mm, filled with 100% density chemical anchors. The pull-out force must pass a 10 kN field test.
On color steel tile roofs, the lightning rod bracket should span at least three purlins, using self-tapping screws and butyl tape for waterproof sealing. The seal lifespan must match the system's 25-year cycle.
The contact resistance between the base and the roof conductor should be measured with a micro-ohmmeter and must be below 2 mΩ.
In high lightning areas (more than 40 thunderstorm days per year), an additional 1.2-meter diameter pressure-equalizing ring should be installed around the base to reduce the step voltage generated during a strike, protecting personnel performing maintenance on the roof.
Internal Protection
Choosing the Right Protector
Surge currents caused by induced lightning typically have extremely high voltage rise rates ($du/dt$), which can instantly push the DC bus voltage from 600V - 1000V to over 10 kV in nanoseconds.
To intercept this energy, a Type 2 SPD must be installed on the DC side.
Its core module, the Zinc Oxide Varistor (MOV), has infinite resistance and a leakage current of less than 20μA under normal voltage. When a surge occurs, its resistance drops to the milliohm level within 25 nanoseconds, discharging excess current to the ground.
l Maximum Continuous Operating Voltage ($U_c$): The $U_c$ of a DC SPD must be greater than 1.1 times the system's open-circuit voltage ($V_{oc}$). For example, for a 1000V system, the $U_c$ should be at least 1100V to prevent misoperation and self-combustion during grid fluctuations or high temperatures.
l Voltage Protection Level ($U_p$): This is the most critical indicator and must be lower than 80% of the protected equipment's (e.g., inverter) insulation strength. If the inverter's rated impulse withstand voltage is 6 kV, an SPD $U_p$ between 2.5 kV and 4.0 kV is recommended to provide a 20% safety margin.
l Discharge Capacity ($I_n/I_{max}$): Standard configurations should choose a nominal discharge current ($I_n$) of 20kA and a maximum discharge current ($I_{max}$) of 40kA. Statistics show this specification handles over 98% of induced lightning electromagnetic pulses.
l Installation Lead Length: The total length of the SPD connecting wires (phase + ground) strictly must not exceed 0.5 meters. Every additional 1 meter of lead generates an extra 1 kV pressure drop due to inductive reactance, which stacks directly onto $U_p$ and can render the protection completely ineffective.
l Disconnector Design: It must include a thermal disconnector. When the MOV internal temperature exceeds 180°C - 200°C due to frequent surge absorption, the mechanical disconnector should cut the circuit within 0.1 seconds to prevent fire.
Cutting Off the Induction Path
According to Faraday's Law of Induction, $V = -d\Phi/dt$, where the induced voltage is proportional to the loop area.
In actual installations, if the DC positive and negative cables are routed separately, forming a large loop of 10 square meters, a nearby 50kA lightning strike can induce an overvoltage of more than 5,000V in the cables.
l Overlapping Wiring Requirements: DC positive and negative cables must be kept tightly together along the entire path, preferably tied with cable ties every 30 cm - 50 cm. Reducing the loop area to below 0.1 square meters can reduce induced voltage to about 1% of its original value.
l Shielding Effectiveness: All DC and AC cables should be encased in galvanized steel pipes with a wall thickness of at least 1.5 mm. Experiments show that fully grounded metal pipes can attenuate magnetic field induction by more than 60 dB, reducing electromagnetic interference energy by 99.9%.
l Equipotential Jumpering: Connection points of metal pipes or cable trays must have jumper wires to ensure the resistance of the entire segment is below 0.03 Ω. If the pipeline length exceeds 30 meters, a grounding connection point should be added every 20 meters.
l Advantages of Multi-core Cables: Whenever possible, prioritize multi-core solar-rated cables. Since the cores are naturally within the same sheath, their physical loop area is virtually zero, eliminating the root cause of induced lightning.
l Spacing Control: A parallel clearance of at least 200 mm should be maintained between DC power lines and signal lines (e.g., RS485) to prevent secondary coupling interference during lightning discharge, avoiding damage to inverter communication boards.
Protecting the Inverter
As the most fragile electronic module in the system, inverters usually have built-in micro-lightning protection units, but these are often insufficient to resist moderate to high-intensity lightning surges.
Internal protection for the inverter must be carried out simultaneously across three dimensions: the DC input side, the AC output side, and the metal chassis.
Inverter Protection Requirements | Quantified Indicators & Details |
DC Withstand Level | 1000V systems must withstand 4000V pulse tests (duration 1.2/50μs). |
AC Side SPD Configuration | A Type 2 three-phase AC SPD must be installed, with $U_p$ matching the 230V/400V grid. |
Chassis Ground Impedance | The connection impedance between the chassis and the ground bar should be < 0.1 Ω. |
Insulation Detection | Built-in leakage monitors must act within 0.3 s for a 30 mA induced leakage current. |
SPD Redundancy | For inverters with 2 independent MPPT inputs, each route requires its own DC SPD. |
Lightning strikes can sometimes cause instantaneous grid voltage fluctuations, producing spikes over 440 V.
By setting the overvoltage protection action value to 270V (single-phase) or 460V (three-phase) with an action time of less than 0.2 seconds, the breakdown of inverter power modules (IGBTs) due to grid-side surges can be effectively avoided.
Statistics show that systems equipped with comprehensive AC/DC dual-side protection have an inverter failure rate 75% lower than those with single-sided protection.
Managing Signal Lines
RS485, Ethernet, or sensor lines operate at voltages typically only 5V or 12V, with extremely low tolerance for logic level fluctuations.
l Signal SPD Selection: Before communication lines enter the inverter or data logger, a signal-grade surge protector must be connected in series. Its rated operating voltage ($U_n$) should be 5V or 12V, and while its discharge current only needs to be 3kA - 5kA, its response time must be faster than 1 nanosecond.
l Shielded Twisted Pair (STP): Communication lines must use STP with a shielding mesh density greater than 85%. The shield should be grounded at a single point on the inverter side to prevent ground loop currents from interfering with data transmission.
l Voltage Limiting Performance: The residual voltage (clamping voltage) of the signal lightning arrester should be controlled within 20V - 40V. For chips working at 5V, instantaneous energy exceeding 50V will cause permanent physical breakdown.
l Wireless Module Protection: If using WiFi or 4G/5G antennas, the antenna feeder should be equipped with a coaxial lightning arrester to prevent lightning waves from invading the monitoring terminal through the antenna.
l Wiring Depth: Directly buried signal cables should be at least 0.7 meters deep, covered with 10 cm of fine sand and a warning tape to prevent lightning current from entering via ground conduction.
Equipotential Connectivity
The final line of internal lightning protection is Equipotential Bonding.
Its purpose is not to lead lightning current into the ground, but to ensure the potential of all metal objects in the room rises at the same instant, thereby eliminating voltage differences between them.
A Main Equipotential Bonding bar (MEB) must be set up near the inverter room or distribution cabinet.
This bar is usually made of a 40 mm × 4 mm purple copper strip with a conductivity greater than 98% IACS.
All metal pipes entering the building (water, gas), metal bridges, inverter chassis, SPD ground terminals, and distribution box shells must be connected to this busbar via yellow-green copper core wires of at least 16 mm².
This connection method controls the potential difference between devices within 10V, completely eliminating the possibility of back-arcing.
For high-value systems, connection points should undergo contact resistance testing every two years.
If the resistance increases from an initial 0.01 Ω to above 0.05 Ω, the surfaces must be polished and anti-corrosion gaskets added to maintain the low-impedance discharge path.
The Foundation
Digging Deep
In most soil environments, the resistivity below the surface from 0.5 meters to 1.5 meters fluctuates violently with seasonal moisture, with fluctuations exceeding 200%.
To obtain a stable low-impedance path, the top of the grounding electrode must be buried at least 0.8 meters below the ground, and a length of 2.5 meters to 3.0 meters is recommended for single vertical electrodes.
When a lightning wave carries 30kA of current, if the electrode depth is insufficient, the surface potential gradient will rise rapidly, generating a step voltage of over 10 kV within a 5-meter radius.
By increasing the number of vertical electrodes and maintaining a spacing of more than 5 meters, the multi-point dispersion effect can reduce the total grounding resistance to below 4 Ω.
In high-resistivity sandy or rocky areas, if the measured resistance exceeds 10 Ω, deep-well grounding technology is required, driving electrodes 10 meters or even 20 meters into constant humidity layers, improving single-point efficiency by 45% to 60%.
Burial depth exceeds 0.8 meters.
Electrode spacing maintained at 5+ meters.
Target resistance below 4 Ohms.
Selecting the Rods
The specifications and chemical stability of grounding materials are prerequisites for a 25-year system lifespan.
The market mainstream chooses copper-clad steel grounding rods with diameters of 14.2 mm or 17.2 mm.
The surface copper thickness must be greater than 0.254 mm (254 μm) to ensure no galvanic corrosion occurs under high current impact.
In comparison, hot-dip galvanized angle steel is 30% cheaper, but its average annual corrosion rate in normal soil is about 0.06 mm, accelerating to 0.15 mm in coastal damp areas, which causes its effective conductive cross-section to shrink by 40% within 10 years.
Copper-clad steel is required to have a conductivity of over 20% IACS, and its surface hardness must support penetration into hard soil layers driven by heavy electric hammers without bending.
The horizontal flat steel connecting these electrodes must have a cross-section of at least 100 mm² and a thickness of 4 mm.
This ensures that when bearing the thermal effect of lightning current for 0.1 seconds, the temperature rise is controlled within the 300°C safety threshold, preventing underground connections from melting and disconnecting.
Copper layer thickness > 254 microns.
Flat steel cross-section ≥ 100 square millimeters.
Material life must meet the 25-year cycle.
Building a Grid
For distributed PV arrays, a closed horizontal grounding loop should be constructed around the bracket foundations. The perimeter of the loop net is usually between 40 meters and 200 meters, depending on the installed capacity.
Inside the loop, jumper wires should be laid every 6 to 10 meters to form a grid structure, which can reduce transient impedance by approximately 35%.
Ordinary bolt connections are strictly prohibited for all nodes; exothermic welding must be used. The graphite molds for welding must withstand high-temperature melting over 1000°C to achieve molecular-level bonding of the conductors.
Experiments show that the contact resistance of an exothermic weld is less than 0.01 mΩ, and its pull-out strength is 20% higher than ordinary welding, effectively resisting the massive electromagnetic forces generated by lightning currents.
For large ground-mounted power stations, the grounding grid coverage should exceed 110% of the PV array's projected area, ensuring the potential distribution remains flat even when lightning strikes the edges.
Grounding Grid Indicators | Quantified Requirements |
Grid Size | Recommended between 6m × 6m and 10m × 10m. |
Weld Point Resistance | Contact resistance must be below 0.01 mΩ. |
Pull-out Strength | Welding strength must be > 400 MPa. |
Potential Gradient | Instantaneous potential difference between any two points ≤ 1000 V. |
Dissipation Surface Area | Underground dissipation area per kW installed > 0.5 m². |
Adding Ground Enhancement Materials
A standard 25 kg bag of long-acting physical Ground Enhancement Material (GEM), composed mainly of bentonite, graphite, and conductive cement, usually has a resistivity below 0.5 Ω·m after curing.
By filling a column of GEM with a diameter of 150 mm and a depth of 2.5 meters around the grounding electrode, the grounding resistance of a single rod can be reduced by 60% to 80%.
This material has strong water absorption and retention properties, keeping the soil moisture around the electrode above 15% long-term. Even in a dry season with 60 days of no rain, resistance fluctuations can be controlled within 10%.
GEM also forms a passivation film on the surface of metal conductors, blocking acidic ions from chemically attacking the steel and extending the maintenance cycle of the grounding system by 1.5 times.
Standard bag weight is 25 kg.
Reduction efficiency can reach 60% to 80%.
Water retention rate must be maintained above 15%.
Accurate Resistance Testing
During testing, the voltage electrode should be placed 20 meters from the edge of the grounding grid, and the current electrode should be 40 meters or further away to avoid the potential compensation zone of the grid itself.
If the measured resistance increases by 20% compared to the initial installation, it indicates physical fractures or severe corrosion at underground connection points.
In high-thunderstorm areas, in addition to conventional power-frequency grounding resistance, impulse grounding resistance must be evaluated because lightning is a high-frequency pulse signal, and wire inductive reactance increases significantly at high frequencies.
During testing, the torque of connection bolts should be calibrated with a scale wrench to 10Nm - 12Nm, ensuring the contact resistance fluctuation between the measuring fixture and the down-conductor is below 0.05Ω.
For commercial power stations, it is recommended to perform a soil resistivity profile test every 3 years to dynamically adjust reduction strategies based on data changes.