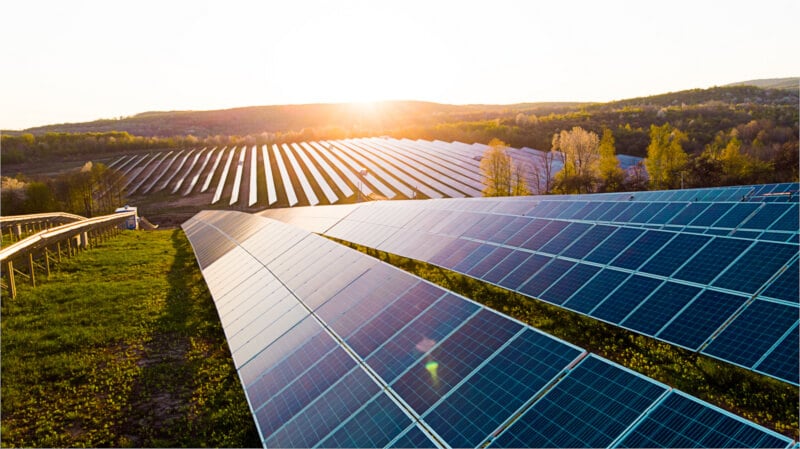
How to Choose Small Solar Modules | Watts, Volts, Size
Selecting small solar modules requires precise matching with the powered device. The key parameters are the working voltage (Vmp) and power (W).
For example, to charge a 12V cell, you need to choose a module with a Vmp of about 18V (e.g., 30W) to ensure sufficient voltage remains under real light conditions.
The size should fit the installation space. Common power ranges are 5W-50W, with sizes roughly from A4 to A3 paper size.
Watts
A 20W panel might fully charge a phone in 5 hours, whereas a 100W panel, if the voltage doesn't match, might not charge your portable power station at all.
Typical power covers from 10W (slow phone charging only) to over 200W (supporting high-power devices like car fridges), but actual generation efficiency is constrained by an average of about 4-5 hours of effective daily sunshine.
Simultaneously, different output voltages like 12V, 18V determine compatibility with batteries or controllers, while size and weight directly relate to portability.
Two 100W panels with similar efficiency can differ in weight by over 1 kg.
Meaning of Watts
Why Watts are the Starting Point for System Design
Planning any solar power system, whether for an RV or a backyard shed, starts with calculating your total energy needs, and Watts are the fundamental unit for this calculation.
You need to list the power consumption of all your devices. A smartphone charger is about 5-10W, a Mac Book Pro charger is around 60-100W, and an efficient 12V car fridge might average 30-60W.
After calculating total consumption, you can determine the required panel wattage.
For example, if your daily energy need is 500 Watt-hours (Wh), and your location's average peak sun hours is 4 hours, the theoretical minimum panel power is 500 Wh ÷ 4 h = 125 W.
But considering efficiency losses, you'd need at least a 150W or even 200W panel to reliably meet the 500 Wh daily demand in practice.
How Watts Relate to Other System Modules
Panel wattage cannot be chosen independently. It must match the specifications of the charge controller and cell.
Charge controllers have maximum input power and voltage limits. Connecting a high-wattage panel to a small controller can overload and damage it.
For example, a 200W panel might have a max current of 11A. If your controller max is 10A, this combination is unsafe.
Similarly, the cell's charge rate must be considered. A 100Ah lead-acid cell's recommended charge current is typically 10-30A. Using an overly powerful panel for fast charging might damage the cell.
How Different Technologies Affect Wattage Output
Not all panels rated at the same wattage perform identically.
Monocrystalline panels typically have higher conversion efficiency than polycrystalline or thin-film panels.
A monocrystalline panel can output higher watts for the same physical size.
For example, a standard-size (≈1.6 m²) 60-cell monocrystalline panel might reach 300W, while a similar polycrystalline panel might only achieve 270W.
Thin-film panels, while less efficient, have smaller performance drops in low-light and high-temperature conditions, sometimes yielding comparable total daily energy to higher-rated crystalline panels.
Determining Wattage Based on Need
List Your Power-consuming Devices
First, list all devices to be powered by solar. Find each device's power consumption (Watts) and planned daily usage (hours).
Some devices have fixed power (e.g., a 10W LED light). Others vary (e.g., a laptop: 20W low load, 60W high load).
Use an average value like 40W. Refer to the device's rating label.
Calculate Total Daily Energy Consumption
Energy consumption is measured in Watt-hours (Wh): Power (W) × Time (h).
Example calculations:
· 12V DC fridge (40W avg, 24h/day): 40W × 24h = 960 Wh
· 5 LED lights (6W each, 4h/day): (6W × 5) × 4h = 120 Wh
· Laptop (50W, 5h/day): 50W × 5h = 250 Wh
· Phone charging (10W, 2h/day): 10W × 2h = 20 Wh
Total daily need: 960 + 120 + 250 + 20 = 1350 Wh (or 1.35 kWh).
Work Backwards to Determine Panel Power Based on Sunlight
Solar panels don't generate 24/7. Their output depends on "peak sun hours" - hours of strong sunlight equivalent to standard conditions.
Peak sun hours vary by location/season (e.g., >6h in US Southwest summer, ~1h in Northern Europe winter). Check local solar radiation data. Assuming 4.5 peak sun hours:
Minimum Panel Power (W) ≈ Total Daily Energy (Wh) ÷ Local Peak Sun Hours (h)
Example: 1350 Wh ÷ 4.5 h ≈ 300 W. (Theoretical minimum under ideal conditions).
Account for Real-world System Energy Losses
Real systems have losses that must be accounted for:
· Temperature Loss: Panel efficiency drops with heat (5-15% power loss).
· Soiling/Shading Loss: Dirt, leaves, partial shade reduce output (3-10% loss).
· Wiring/Conversion Loss: Losses in cables, charge controller, inverter (5-10% in a well-designed system).
A reasonable approach is to add a 20-30% safety margin to the theoretical power.
Example: 300 W × 1.25 (25% margin) = 375 W.
Therefore, to reliably meet the 1350 Wh daily demand, consider a panel around 375W (e.g., two 190W panels in parallel or one 400W panel).
Wattage Application Ranges
10-30 Watts:
Panels in this range are lightweight (300-700g), foldable/compact, designed for mobility.
Suitable for charging smartphones (5-10W), GPS (5-8W), cameras (5-10W), headlamps (2-5W).
A 20W panel can charge a dead phone in ~2.5h under ideal sun.
Cannot support devices needing >15W continuously (e.g., laptop charging is very slow).
50-100 Watts:
A 100W panel yields ~400Wh in 4 sun hours, enough to charge multiple devices: phones (4-6 full charges), tablets (1-2), drones (1-2 flights), LED lights (10-20h runtime), and recharge portable power stations (500-1,000Wh capacity).
Cannot run high-power appliances like kettles (1000W+). Weight: 2-4 kg.
150-350 Watts:
A 300W system (e.g., 2x150W panels) yields ~1500Wh in 5 sun hours.
Can support: 12V DC fridge (500-800Wh/day), laptop (6-8h use), small TV (4-5h viewing), CPAP machine (overnight).
With a 2000Wh+ cell, can intermittently use a small microwave (800W) or kettle (1000W) 1-2 times.
Requires robust mounting and a 30A+ MPPT charge controller.
System voltage is often raised to 24V/48V to reduce line loss.
400 Watts and Above:
Typically for fixed off-grid sites: cabins, remote comms stations, B&Bs. A 2kW (2000W) array yields ~8kWh daily in 4 sun hours (~60-70% of avg US household use).
Can power: water pump (1 h irrigation), small AC unit (several hours), full kitchen appliances (fridge, lights, washer).
Requires professional cell bank (e.g., 48V 400Ah Li, ~20kWh storage), 3kW+ inverter, energy manager. High initial cost, requires professional installation/design.
Volts
Market data shows nearly 30% of users fail to charge effectively due to voltage misunderstandings: e.g., mistaking a "12V" panel's output as 12V, when its working voltage needs to be 17-18V to charge a 12V cell.
Wattage inflation is common; a 20W-rated panel might only output 15W under standard tests, a 25% difference.
Monocrystalline modules are typically 3-5% more efficient than polycrystalline, yielding 2-3 more watts in the same area.
Three Voltages
Nominal Voltage:
It's not a precise measurement. Under STC, a quality 12V nominal panel's actual working voltage (Vmp) is typically 17.5V-18.5V.
This ensures it provides enough voltage (14.4V needed for 12V cell charging) even after real-world losses.
Open-Circuit Voltage (Voc):
A 12V nominal panel's Voc is easily 21.5V-23V. This value is critical for system safety, primarily for selecting a charge controller. The controller's max PV input voltage must be significantly higher than the panel's Voc because:
1. Low-Temperature Effect: Panel voltage increases as temperature decreases. Spec sheet Voc is at 25°C. At -10°C, Voc might rise 10% to over 25V. A controller with a 25V max input could be damaged in winter.
2. Safety Margin: Manufacturers recommend a >20% safety margin. E.g., a panel with 22V Voc should connect to a controller with max input voltage ≥ 26.4V.
Maximum Power Point Voltage (Vmp):
Vmp is the voltage at which the panel outputs maximum power. It's a dynamic, efficiency-optimized balance point. Under STC, a 12V panel's Vmp is typically 17.0V-18.0V.
The table below shows the typical relationship between voltage and power output:
Voltage State | Voltage Value (Example) | Current | Output Power | System State |
Open-Circuit Voltage (Voc) | 22.0V | 0A | 0W | Idle, not working |
Max Power Point Voltage (Vmp) | 17.5V | 5.71A | ~100W | Maximum Efficiency Output |
Near Cell Voltage | 13.5V | 6.5A | ~88W | Reduced Efficiency |
Why is Vmp so important?
Because a key task of the charge controller is to keep the panel operating near its Vmp. A PWM controller drags the panel voltage down to near the cell voltage, forcing it away from Vmp, potentially losing >30% energy.
An MPPT controller tracks Vmp and efficiently converts the high-voltage DC to low-voltage/high-current suitable for charging, recovering 15-30% more energy, especially in suboptimal light/temperature.
Environmental effects on the three voltages differ:
· Light Intensity Change: Primarily affects current; voltage changes slightly. Voc and Vmp drop only a small amount from full sun to cloudy.
· Ambient Temperature Change: Significantly affects voltage. Voltage decreases ~0.3%-0.5% per C temperature increase. On a hot summer day (panel temp 60°C), Vmp might drop from 17.5V to ~15V, drastically reducing efficiency even if the system still works.
Voltage Matching Strategy
Matching Differences: PWM vs. MPPT Controllers
These controllers handle voltage very differently, determining final system efficiency.
PWM Controller: When on, it pulls the panel voltage down close to the cell voltage (e.g., cell at 12.5V, panel at ~12.5V). The panel operates far from its efficient Vmp. A panel capable of 17V/5A (85W) might only deliver 12.5V/5A (62.5W), a >25% potential power loss.
MPPT Controller: This is an intelligent DC-DC converter. It lets the panel operate near its Vmp (e.g., 17.5V), then converts it to the appropriate cell charging voltage (e.g., 14.4V) with high efficiency (95%). In the example, it extracts ~85W at 17.5V/4.86A, converts to ~82.5W at 14.4V/5.73A. Compared to PWM's 62.5W, MPPT delivers >30% more energy.
Temperature's Impact on Matching Strategy Cannot Be Ignored
Panel voltage has a negative temperature coefficient ( -0.3% to -0.5%/°C). On a hot summer day (panel temp >60°C), Vmp can drop to ~15V. A PWM controller's efficiency drops further.
An MPPT controller adapts better, extracting max power even at lower voltages, showing superior environmental adaptability.
Matching Voltage for Portable Power Stations
Modern portable power stations have a built-in DC-DC converter with MPPT algorithm, accepting a wide input range (e.g., 12V-30V). Choosing an 18V or 20V nominal panel is ideal because:
1. Optimized Operating Range: The 18V panel's Vmp range (e.g., 16V-20V) fits well within the station's efficient input range.
2. Compensates for Line Loss: Higher initial voltage better resists voltage drop over long cables.
3. Physical Design: Such panels are often foldable/portable, matching the power station's use case.
Precise Matching for Directly Driving Small Devices
Directly driving small DC devices (3V/5V LED, fan) without a cell/controller is risky. Panel voltage fluctuates wildly with light. A "5V" panel might produce >7V in strong sun, instantly destroying a 5V device.
Voltage Calculation When Combining Multiple Panels
To increase system power, panels can be connected in series (increases voltage, current stays same) or parallel (increases current, voltage stays same).
· Series: Connect positive of one to negative of next. Total voltage = sum of individual voltages. Current remains same. (2x 22V/5A panels in series: 44V Voc, 5A).
· Parallel: Connect all positives together, all negatives together. Total voltage remains same. Current = sum of individual currents. (2x 22V/5A panels in parallel: 22V Voc, 10A).

Size
When selecting small solar panels for portable power or IoT devices, parameters like 20W, 18V, 300g are far more meaningful than a simple "high efficiency" label.
The core of selection lies in understanding the synergy between Watts (W), Volts (V), and physical size.
Blindly pursuing high wattage while ignoring voltage matching can lead to a charging efficiency drop of over 50%.
Size and Installation
Methods for Precise Measurement
Don't eyeball the installation space. Measure these key dimensions:
1. Net Space Dimensions: Use a tape measure for length and width. Crucially, measure the "net" space, excluding obstructions like roof racks, antenna bases. E.g., an RV roof might be 2m long, but the clear space between racks is 1.8m x 0.9m.
2. Allow for Expansion Gap: Panels expand when hot. Leave at least 1.5-2cm gap on each side, especially for rigid panels. In a 1.8m space, panel length should be ≤ 1.77m.
3. Check Surface Flatness: Many surfaces aren't perfectly flat. Use a straightedge. For spans >60cm, unevenness >5mm requires attention, as it can stress rigid panels, causing micro cracks.
Different Surfaces, Different Methods
Panels can be installed on various surfaces, but methods differ drastically.
l Flat Surface Installation (e.g., RV flat roof, shed roof)
Mounting Base: Use Z or L-shaped aluminum brackets. Bracket height (3-5cm) provides crucial ventilation, lowering operating temp by 10-15°C, boosting efficiency ~3-5%.
Fixing Method: Brackets bolt to panel frame; other end fixed to roof with waterproof bolts. Seal bolt holes thoroughly with high-quality polyurethane sealant (e.g., 3M™ 5200) for long-term waterproofing. Bolt spacing: 40-60cm recommended for wind resistance.
l Curved Surface Installation (e.g., boat roof, curved RV roof)
Challenge: Curved surfaces lack stable flat support. Forcing rigid panels causes stress.
Solution: Prefer flexible or semi-flexible panels that can bend to a certain arc. Use adhesive rated for curved surfaces (shear strength >2.5 MPa) for high-speed travel.
l Uneven Surface (e.g., tiled roof, corrugated metal)
Adapter: Use special mounting brackets that interlock with the profile to create a level platform.
Note: Installation may require temporarily removing tiles to fix brackets directly to the roof structure.
Improper Installation Can Reduce Power by 20%
Unprofessional installation directly harms performance:
· Shading is a Critical Failure: Even a thin shadow (e.g., from a wire) can cause a panel's output voltage to plummet, potentially losing >50% power. Ensure the location is completely shadow-free during key sun hours (e.g., 9 am - 3 pm).
· Poor Heat Dissipation Causes Efficiency Drop: Rated power is at 25°C cell temp. If the panel is flush against the surface without ventilation, the back temp can exceed 70°C. For crystalline silicon, power decreases ~0.4% per C rise. A poorly cooled 100W panel might only output 80W or less in heat.
· Mechanical Stress Causes Microcracks: Uneven frame stress (e.g., on an uneven surface without shims) or mishandling can cause invisible cracks in silicon cells.
Factors Affecting Power Output
Light Intensity is the Decisive Factor
Panel output is nearly proportional to sunlight intensity (W/m²).
· Ideal Peak (1000 W/m²): Basis for STC. Briefly achieved near solar noon on clear days.
· Attenuation in Common Conditions:
o Clear Summer Noon: 800-900 W/m² (80-90% of rated power).
o Thin Clouds: 500-700 W/m² (50-70% of rated power).
o Heavy Haze/Overcast: 100-300 W/m² (10-30% of rated power).
Geographic location and season have a huge impact. The same panel's output at noon in Arizona summer can be >60% higher than in Washington state winter.
Temperature Rises, Power Drops
Panel conversion efficiency decreases as its temperature increases.
· Temperature Coefficient: Spec sheets list a "Power Temperature Coefficient", typically around -0.4% / C.
· Practical Calculation: STC is at 25°C. In summer sun, panel temp can reach 65°C.
o Temp difference = 65°C - 25°C = 40°C
o Power loss = 40°C * -0.4%/°C = -16%
o A 100W panel loses ~16W just from heat, reducing output to ~84W.
Shading's Destructive Power is Underestimated
Partial shading has a non-linear, "bucket effect" impact.
· Principle: Panels have cells in series. Current is limited by the weakest cell. A shaded cell's resistance increases, becoming a power consumer, dragging down the entire string's current.
· Bypass Diode Role: Diodes are installed to mitigate shading. If a cell string is severely shaded, the diode bypasses it. But this means even 10% area shading can cause 30-50% instant power loss, as that entire string stops generating.
Importance of Panel Orientation and Tilt Angle
Whether sunlight hits the panel perpendicularly determines photon reception per unit area.
· Optimal Angle: For fixed installs, a "yearly optimal tilt angle" exists, often near local latitude. Deviations cause efficiency loss.
· Efficiency Loss Estimate:
o 15 tilt deviation from optimal: ~1-3% annual energy loss.
o 30 azimuth deviation from true south (NH): ~5-10% annual energy loss.
· Solution: If possible, use "adjustable mounts" to change tilt 2-4 times yearly, gaining 5-10% extra annual energy.
Natural Performance Decline Over Time (Degradation)
All panels slowly lose conversion efficiency over time.
· First-Year Degradation: Quality panels typically degrade faster in the first year, around 1-2%.
· Annual Degradation: Stabilizes afterwards at ~0.5%-0.8% per year.
· Quality Difference: Tier-1 brands often offer 25/30-year linear power warranties, guaranteeing output power remains above a certain percentage (e.g., 85%+) of initial power after 25 years.
Other Non-negligible Details
· Surface Cleanliness: Dust, pollen, bird droppings block light. Regular cleaning (depending on environment, typically every 1-3 months) can yield a 3-10% energy boost.
· Line Loss and Conversion Loss: Long/thin cables from panel to controller cause resistive loss. Use sufficiently thick cables (e.g., for 10A current over 5m in a 12V system, use at least 10 AWG cable) to keep line loss under 2%.
· Charge Controller Efficiency: Controller conversion efficiency (MPPT: 95-98%, PWM: 75-90%) directly affects energy finally reaching the cell.