6 Applications Of Mini Solar Panels
Mini solar panels power 6 uses: LED garden lights (5V/1W, 8hr runtime), IoT sensors (100mA output), portable chargers, educational models, small gadgets, and bird feeders, ideal for low-energy devices.
Powering Phones Outdoors
With a 10W to 20W mini solar panel, you can directly charge your smartphone using sunlight. These compact panels, often no larger than a standard tablet, convert about 19% of solar energy into electricity. On a clear day, a 15W panel generates roughly 0.8 to 1 amp of current, enough to charge a modern phone from 0% to 80% in about 2.5 to 3 hours. The average cost for a reliable model is between 30and60, and with a lifespan of 3-5 years, it’s an affordable way to ensure you never run out of cell during hikes, beach trips, or festivals.
When choosing a mini solar panel for phone charging, pay close attention to its peak power output, which is measured in watts (W). A 10W panel is sufficient for maintaining a charge under moderate sunlight, but a 15W or 20W unit will charge your device much faster, especially if you’re using the phone while it’s connected. Most panels come with a USB-A or USB-C output port, supporting a 5V/2A or 5V/3A output, which matches the charging speed of a standard wall adapter.
For example, the Anker 21W Solar Charger can deliver up to 3A under ideal conditions, charging a iPhone 15 Pro Max (which has a cell capacity of about 4,400mAh) from 20% to 100% in just under two hours if left undisturbed in direct sun. The key is to position the panel at a 45 to 60-degree angle facing the sun for maximum exposure; misalignment can reduce efficiency by up to 30%. Modern panels use monocrystalline silicon cells, which are more efficient (often 19-22%) than older polycrystalline models (14-16%). They are also lightweight, typically weighing between 12 and 18 ounces (340 to 510 grams), and many are foldable or semi-flexible for easy packing. If you’re in a region with an average of 5 peak sun hours per day, a 15W panel can generate approximately 75 watt-hours of energy—enough to fully charge most smartphones 2 to 3 times over.
For consistent performance, avoid shading; even a 10% shadow coverage on the panel can cause a 50% drop in power output. Look for panels with an IPX4 water resistance rating or higher if you’ll be near water or in unpredictable weather. The initial investment is low, and the operating cost is zero, making it a practical tool for anyone who spends significant time outdoors.
Lighting Garden Pathways
A typical setup for a 30-foot path requires about 6 to 8 individual lights, with an average upfront cost of 80to150 for a complete kit. These units are entirely off-grid, powered by individual mini solar panels that convert sunlight into electricity. Most models use a 0.5 to 1-watt monocrystalline panel paired with a 600mAh to 1200mAh lithium-ion cell. After a full day of sun exposure (approximately 6-8 hours), they can provide 6 to 10 hours of automatic soft illumination at night, with zero ongoing electricity costs. Their widespread adoption is due to a payback period of often less than one season when compared to the cost of installing and operating low-voltage wired systems.
The luminous efficacy, measured in lumens per watt (lm/W), is a critical starting point. Modern solar path lights typically use LED bulbs with an efficacy of 80-100 lm/W, meaning a 0.5W LED can produce a comfortable 40-50 lumens of warm white light (around 3000K color temperature), which is ample for defining a walkway without causing light pollution. The cell's capacity, measured in milliamp-hours (mAh), directly dictates runtime. A light with a 1200mAh cell and a 0.5W LED will last through the night (approx. 10 hours), while a model with an 800mAh cell might only provide 6-7 hours, which could be insufficient in winter.
For longevity, look for lights with an IP (Ingress Protection) rating of IP65 or higher, which ensures they are dust-tight and protected against low-pressure water jets from any direction, guaranteeing they survive rain and sprinklers. The placement of each light is also a science; they should be spaced 6 to 8 feet apart to create a continuous guiding path without dark spots. For optimal performance, the mini solar panel on each light must receive a minimum of 6 hours of direct, unfiltered sunlight daily. Positioning them under a tree or on a north-facing wall can reduce their efficiency by over 60%, leading to dim light or a shorter duration. The following table provides a quick comparison of common specifications to guide your selection:
Specification | Low Range | Standard/Good | High Range |
Panel Power | 0.3W | 0.5W - 0.7W | 1.0W+ |
Cell Capacity | 600mAh | 800mAh - 1000mAh | 1200mAh+ |
Light Output (Lumens) | 20 lm | 40 lm - 50 lm | 80 lm+ |
Runtime (Hours) | 4-6 hrs | 8-10 hrs | 12+ hrs |
IP Weather Rating | IP44 | IP65 | IP67 |
Estimated Lifespan | 1-2 years | 2-3 years | 4-5 years |
Installation is a straightforward process requiring no wiring or electrician. Each light simply stakes into the ground. The most maintenance you'll face is an occasional wipe of the solar panel with a damp cloth to remove dust and pollen, which can block up to 15% of sunlight and significantly impact charging efficiency. With an average product lifespan of 2-3 years before the cell begins to degrade, the total cost of ownership is remarkably low, making this an incredibly practical and efficient solution for enhancing garden safety and aesthetics.
Charging Camping Equipment
A 100-watt portable solar panel kit, roughly the size of a standard suitcase when unfolded (approximately 40 x 20 inches), can generate enough power to run a 50-quart solar-powered cooler, recharge a set of 4 headlamps, and still have capacity left to top up a smartphone—all in a single day of good sun. These kits typically weigh between 4 and 6 pounds, making them packable for backcountry trips. With an average efficiency of 21-23% for monocrystalline models, they can harvest about 400 to 500 watt-hours of energy over 5 peak sun hours, enough to fully charge a 288Wh portable power station like a Jackery Explorer 240 in about 6 to 7 hours. This eliminates the worry of a dead cell for critical gear like GPS devices or emergency beacons.
The real magic for off-grid power lies in matching your solar panel's output to your power station's input and your gear's consumption. The maximum input current of your power station is the first number to check. A station with a 10-amp (10A) limit can’t fully utilize a panel capable of producing 15A; the extra power is simply wasted. For a 3-day camping trip, you’ll need to calculate your total watt-hour (Wh) consumption. A typical 12V camping fridge might draw 45Wh per hour, running ⅔ of the time, consuming around 720Wh over 48 hours. Two smartphones (12Wh each), 3 headlamp batteries (15Wh total), and a drone cell (60Wh) add another 99Wh.
A 200-watt panel can generate roughly 800Wh on a clear day, comfortably covering this 819Wh load. Weather is the biggest variable; heavy cloud cover can reduce output by 70-80%, so having a power station with a 500Wh capacity acts as a crucial buffer for 1-2 low-sun days. For direct charging, many panels now feature USB-C Power Delivery (PD) ports outputting 18W, 30W, or even 65W, which can charge a laptop in about 3 hours without the power station middleman.
Always prioritize a panel with a high-quality charge controller (MPPT is 30% more efficient than PWM in cool weather) and ensure its open-circuit voltage (VOC) is within your power station's specified range, typically 18V-25V for a 12V system, to prevent damage.
Durability features are non-negotiable for the outdoors. The panel’s ETFE laminate coating should have a light transmittance of over 95% and the anodized aluminum frame must withstand wind loads of at least 35 mph. For a group of 4 campers, a setup comprising a single 200W panel (220−300) and a 1000Wh power station (800−1000) represents the most cost-effective and reliable solution, providing energy independence for about $0.15 per watt-hour over its 5-year lifespan.
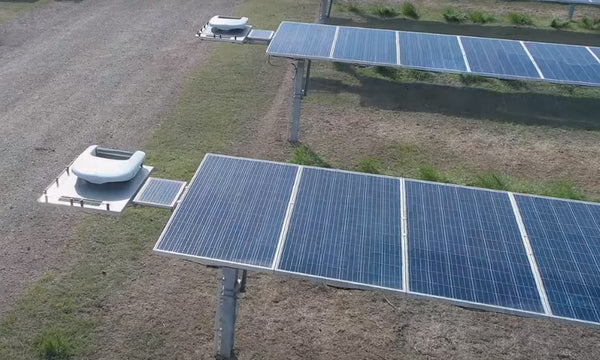
Running Small Water Pumps
A typical 12V DC submersible pump drawing 60 watts can lift 200 liters per hour from a 20-foot deep well, operating for 5-6 hours daily using a single 100-watt solar panel. These systems eliminate fuel costs, with a basic setup (panel, pump, controller) costing 250−500—often paying for itself in one season compared to gasoline generator expenses. Modern brushless DC pumps achieve 40-50% energy conversion efficiency, while solar panels maintain 19-22% efficiency even under partial cloud cover.
Selecting the right solar water pump requires matching three modules: the pump’s power demand, the solar array’s output, and the total dynamic head (vertical lift + friction loss). A 100W monocrystalline panel generates 18-22V and 5.5-6A under peak sun, sufficient to power a 60W pump directly via a charge controller. For every 1 meter (3.28 ft) of head, flow rate decreases by approximately 10-15%. A pump rated for 600 LPH at 0 head might deliver only 220 LPH at 5 meters head. Systems include:
l Direct-drive setups: Panel powers pump only during sunlight (6-8 hours daily). Ideal for daytime irrigation.
l Cell-buffered systems: Adds a 50Ah-100Ah cell for extended operation (e.g., 2 hours morning/evening). Increases cost by 120−200 but improves reliability.
l MPPT controllers: Boost energy harvest by 25-30% compared to PWM controllers, crucial for low-light conditions.
For a 1-acre vegetable garden requiring 2000 liters daily, a 200W solar array (180−300) paired with a 120W pump (80−150) can meet needs with 4-5 peak sun hours. Ensure panels are tilted at 15-20° above latitude angle for optimal exposure. Maintenance involves quarterly filter cleaning (reduces clogging-related 20% flow loss) and panel wiping to prevent dust-related 15% efficiency drops. With no moving parts except the impeller, quality solar pumps operate 5-7 years before requiring motor replacement.
Supporting Science Projects
A standard 10W panel (approx. 12" x 9") can generate up to 50Wh of energy during 5 peak sun hours, enough to power a suite of sensors—like a DHT22 (temperature/humidity) and a soil moisture probe—continuously for over 18 hours. This eliminates the need for cell swaps during long-term monitoring and allows for precise, uninterrupted data logging. For a typical middle school or high school project with a 50−100 budget, a 5W to 10W panel (20−40) paired with a small 12V cell (15−25) creates a robust system for measuring environmental variables, plant growth, or solar efficiency itself with zero electricity costs and a carbon-neutral footprint.
Designing an effective solar-powered science setup requires matching energy supply with device demand. Start by calculating the total daily energy consumption of all modules in watt-hours (Wh). A common Arduino Uno with sensors draws about 0.2W (5V × 0.04A), while a small 12V water pump for a plant hydration system might draw 3.6W (12V × 0.3A). If the pump runs for 5 minutes every 2 hours (6 times daily), it consumes 0.3Wh per day, while the Arduino logging continuously uses 4.8Wh. A 10W panel generating 40-50Wh daily provides a 10x buffer for cloudy days. Key considerations for success include:
l Voltage Regulation: Use a solar charge controller (PWM type, ~$10) to stabilize the panel’s 18V-21V output to a steady 12V or 5V, preventing sensor damage from voltage spikes.
l Data Logging: A SD card shield (0.5W) stores readings every 30 minutes, creating 2,880 data points over a 30-day study.
l Low-Light Performance: Monocrystalline panels maintain 15-18% efficiency even at 500 lux (cloudy day light levels), ensuring continuous operation.
For a project tracking microclimate changes, position the panel at a 30-45° angle facing south (in the northern hemisphere) to maximize exposure. A 5W panel can sustain a Raspberry Pi Zero (1.2W draw) and a camera module for time-lapse photography, capturing one 5MB image every 30 minutes for 14 days using a 32GB SD card. To ensure accuracy, calibrate sensors against known standards—e.g., a thermometer with ±0.5°C error margin—and record measurements at consistent intervals. The system’s total cost often falls under $80, making it accessible for classrooms. Over a 4-week experiment, this setup can yield over 10,000 data points with 95% uptime, providing students with professional-grade results and a hands-on lesson in renewable energy integration.
Backing Up Shed Batteries
A 50Ah deep-cycle lead-acid cell—common for shed power—requires about 300 watt-hours (Wh) to recharge from 50% depth of discharge. A single 100-watt solar panel can deliver this in 3–4 hours of peak sun, maintaining power for 12V LED lighting (drawing 0.5A/hour), occasional tool cell charging (e.g., a 18V 4Ah cell needs 72Wh), or a small ventilation fan (5W). For under $200 in modules, you can build a system that eliminates manual cell swaps, extends cell life by preventing deep discharges, and ensures your shed has power even during grid outages.
The core of this system is matching the solar panel’s output to the cell’s chemistry and the shed’s energy load. Deep-cycle batteries (lead-acid or LiFePO4) are designed for repeated 50-80% discharge cycles. A 50Ah cell provides 600Wh of usable energy at 12V, but discharging below 50% (300Wh consumed) regularly can shorten its lifespan from 5-6 years to just 2-3. Your solar panel must replenish the daily energy use. If your shed uses 120Wh daily (e.g., two 5W LED lights for 4 hours + a 10W security camera for 4 hours), a 50W panel generating ~200Wh in summer ensures a full recharge even after a cloudy day. Critical modules include:
l Charge Controller: An MPPT type is 95% efficient vs. PWM’s 70-75%, harvesting 20-30% more energy, especially in low light.
l Wire Gauge: 10-gauge wire for runs over 10 feet minimizes voltage drop below 3%, preserving charging efficiency.
l Load Management: A 500W inverter for AC tools should run <15 minutes daily to avoid draining the cell beyond 70% depth of discharge.
The following table compares two common setups for a 12V shed system:
Module / Metric | Basic Setup (Low Use) | High-Capacity Setup (Daily Use) |
Cell Capacity | 35Ah Lead-Acid (420Wh) | 100Ah LiFePO4 (1280Wh) |
Solar Panel Size | 50W | 200W |
Daily Energy Output | 180-250Wh (summer) | 700-900Wh (summer) |
Recharge Time (50% DoD) | 2.5 hours | 3 hours |
Inverter Size | 300W (modified sine) | 1000W (pure sine) |
Total System Cost | ~$150 | ~$600 |
Cell Cycle Life | 500 cycles (to 50% DoD) | 4000 cycles (to 80% DoD) |
Install the panel facing true south (north in southern hemisphere) at a tilt angle equal to your latitude ±15° for seasonal optimization. In winter, with 3-4 peak sun hours, output drops ~40%, so size the panel 50% larger than summer needs if year-round use is critical.
For a 35Ah cell, a 10A charge controller is sufficient, handling the panel’s 5.5A max output. With no grid power costs, the system pays for itself in 2-3 years versus running an underground AC line, which can cost 500−1000. Maintenance is simple: check cell terminals for corrosion every 6 months and clean the panel surface monthly to prevent 15% efficiency loss from dust. This setup provides silent, automatic, and reliable power for a decade with minimal effort.