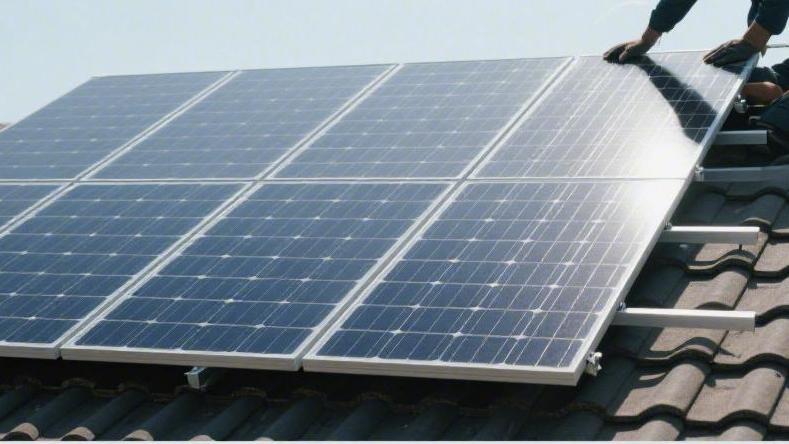
How To Install 400w Monocrystalline Solar Modules On Your Roof
To install 400W monocrystalline solar panels, you need to use M8 bolts to secure the mounting brackets to the roof, setting an optimal tilt angle of 30 to 45 degrees.
Then, use clamps to lock the panels in place, connect the MC4 connectors, and be sure to apply silicone to all drilled holes to prevent water leakage.
Concerns Before Starting
Inspect the Old Roof
The physical lifespan of an asphalt shingle roof is typically between 20 and 25 years. When a roof is over 15 years old, forcibly installing 400-watt modules will cause the sunk costs of later re-roofing to rise sharply. Removing and reinstalling a 10-panel system will typically cost $2,000 to $3,000 in combined labor and scaffolding rental fees. The weight of a standard 400-watt monocrystalline silicon panel is around 21.5 kg to 22 kg. Combined with 2.0 mm thick aluminum alloy rails and M8 stainless steel connectors, the static additional load per square meter will increase by 15 kg to 20 kg.
l The standard spacing for wooden trusses is usually 16 inches or 24 inches (approximately 40.6 cm or 61 cm). Before drilling, a stud finder must be used to ensure that the bolts will 100% bite into the centerline of the 38 mm wide solid wooden beams.
l If the drill entry point deviates from the centerline by 5 mm, it will cause the wind uplift resistance of a single expansion bolt to drop by 40%.
l For steep roofs with a pitch exceeding 35 degrees, construction personnel must wear full-body harnesses and be equipped with a double-hook fall protection system, which will increase the daily labor safety costs by 15% to 20%.
Calculate the Shading Rate
Trees, chimneys, or a neighbor's three-story house around the roof will cut off direct sunlight. Inside a monocrystalline silicon panel, there are 108 or 144 half-cut cells arranged in series. If 10% of the panel's surface area is shaded by leaves or bird droppings, without the installation of power optimizers, the power generation of the entire string will plummet by 30% to 40%. Oak or pine trees in the yard will grow 0.5 to 1 meter taller each year, so when calculating the shading rate, the expansion radius of the tree canopy over the next 10 to 15 years must be factored in.
l When measuring, it is necessary to calculate the solar elevation angle around the winter solstice on December 21. At this time, a 1.5-meter tall exhaust pipe will cast a shadow up to 3.2 meters long in an area at 40 degrees north latitude.
l During the 6 standard sunlight hours from 9 AM to 3 PM, the physical shadow coverage on the panel surface must be less than 5%.
l If a solar pathfinder shows that the monthly shading rate exceeds 15%, the return on investment period for the system will stretch from the expected 7 years to over 11 years.
Check the Electrical Panel
For older houses built before 1990, the main electrical panel's rated current is typically only 100 amps, whereas modern homes are generally upgraded to 200 amps. According to the 120% rule in electrical codes, a 200-amp busbar allows a maximum solar backfeed current of 40 amps (200A x 1.20 - 200A = 40A).
l A 4 kW system has a full-load output current of approximately 16.6 amps on a 240-volt AC grid. After multiplying by a continuous load safety factor of 1.25, a 20-amp double-pole circuit breaker must be configured in the electrical panel.
l Upgrading to a brand new 200-amp electrical panel will consume $1,500 to $2,500 of the overall budget, combining material costs and labor for a licensed electrician.
l The power outage during the electrical panel upgrade will take approximately 6 to 8 hours, during which the refrigerators and Wi-Fi routers inside the house will be at a 0-volt unpowered state.
Run Through the Permitting Process
The review cycle for structural and electrical blueprints submitted to the local municipal building department typically takes 14 to 30 days, with application fees ranging from $100 to $400. Fire codes have explicit setback distance standards; violating these metrics carries a 100% risk of failing the final municipal inspection and facing mandatory removal.
l The top edge of the panels must leave at least 3 feet (approximately 0.9 meters) of clearance from the roof ridge for smoke ventilation and firefighter access paths.
l The side edges of the panels must also maintain a blank area of 1.5 feet to 3 feet from the eaves and side corners, and it is strictly forbidden to cover 100% of the roof area.
l Approvals from the Homeowners' Association (HOA) regarding panel colors typically take an additional 20 to 45 days, for instance, mandating the procurement of all-black-framed panels and pure black rails.
l Signing an interconnection agreement with the local utility company requires a waiting period of 2 to 6 weeks. The agreement will lock in the buyback rate for excess electricity fed back into the grid, such as $0.08 per kWh.
Calculate the Insurance Policy
If the roof was renovated by a third-party contractor within the past 5 years, independently driving 8 mm diameter lag bolts will void the original 10- or 15-year workmanship warranty. Annual premiums for homeowners insurance will fluctuate in amount due to the addition of solar assets worth several thousand dollars.
l Adding a 10-panel system with a nominal rating of 400 watts each to an existing policy will typically increase the annual premium by $50 to $100.
l After the system suffers physical impact from 120 mph (about 193 km/h) wind gusts or 25 mm diameter hailstones, the claim deductible is usually set at $1,000 to $2,000.
l The manufacturer's materials warranty for a 400-watt monocrystalline panel is generally 12 years. If an installation pitch below 10 degrees causes long-term surface water pooling or prevents snow from sliding off, the manufacturer will refuse to replace rusted or short-circuited panels free of charge on the grounds of failing to comply with the 15-degree minimum tilt angle specification.
Essential Tools & Equipment
Choose the Right Drill
When laying 2.5 mm thick aluminum roof rails, an 18-volt brushless lithium-ion impact drill with a rated output torque of 150 Nm can compress the drilling time per hole from 30 seconds down to 8 to 12 seconds. Installing ten 1722 mm by 1,134 mm panels will require driving at least 40 stainless steel lag bolts of 8 mm diameter into the wooden trusses. When operating the 18-volt drill, the rotational speed must be maintained between 1,500 and 2,000 RPM. Once the speed drops below 1,000 RPM, it will cause the sawdust blockage rate inside the 60 mm deep pre-drilled holes to increase by 25%.
Equipped with a 5.0 Ah backup cell, you can maintain continuous high-intensity drilling output for 45 minutes under 30°C sun exposure, speeding up the overall bracket installation progress for the ten 400-watt panels by 1.5 hours.
Using a 100 mm long, 5/16-inch diameter high-speed steel drill bit to drill pilot holes will increase the subsequent bite area between the 80 mm long lag bolts and the wood by 40%, bringing the overall wind uplift resistance to the standard of 450 kg per bolt. On a 20-degree sloped surface, the weight of the entire drill with the cell must be controlled between 1.8 kg and 2.2 kg to reduce muscle fatigue in the wrist after continuously withstanding 75 newtons of reactive force.
Buy the Right Torque Tools and Crimpers
To tighten the edge clamps of 400-watt monocrystalline silicon panels, you must use a mechanical torque wrench with a 3/8-inch square drive, with a range covering 10 Nm to 50 Nm. The aluminum frame of the panels is typically 30 mm or 35 mm thick, and the torque applied to the M8 mid-clamp screws must be precisely controlled between 14 Nm and 15 Nm. If the torque deviation caused by a manual wrench exceeds ±10%, the probability of a 21.5 kg panel coming loose during 120 km/h wind gusts will spike by 60%.
To make the connectors for the photovoltaic DC lines, you need to purchase a dedicated MC4 ratcheting crimper with a crimping area covering 2.5, 4.0, and 6.0 square millimeters. During each closed crimping action, the handle must output 25 kg to 30 kg of physical mechanical pressure.
After stripping 8 mm to 10 mm of insulation from a 4 square millimeter (10 AWG) copper core wire and pushing it into the metal pin, the pull test reading of the single-crimped connection must exceed 300 newtons. A qualified physical connection can keep the connector resistance below 0.5 milliohms, avoiding localized high-temperature meltdowns above 80°C when 30 amps of DC current continuously passes through. The jaw closure gap error of the wire strippers cannot exceed 0.1 mm, and when cutting through the 2 mm thick polyethylene insulation, the stripping rate must reach 100% to prevent severing the internal 56 strands of 0.3 mm diameter tinned copper wires.
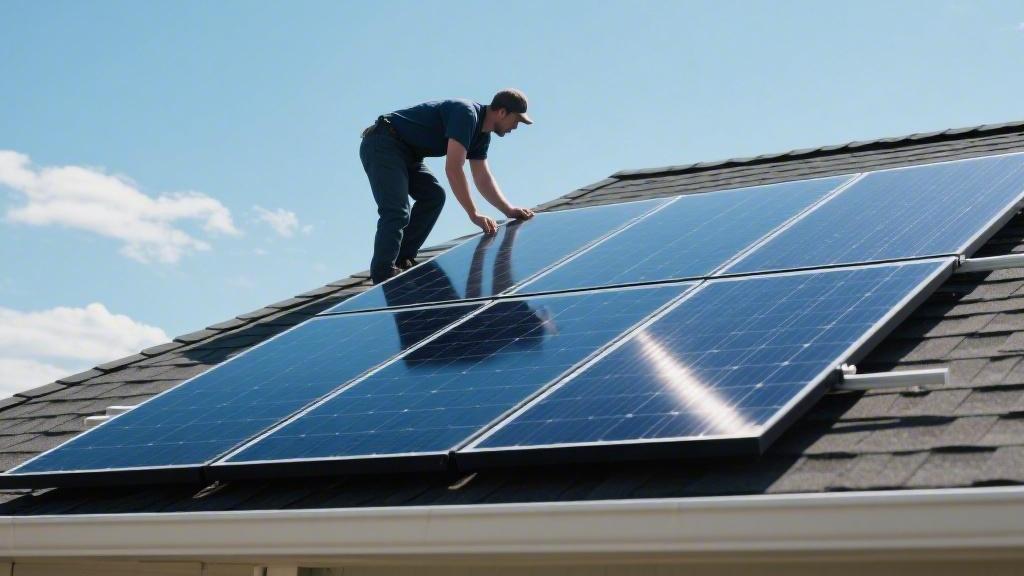
Wear Safety Gear
Asphalt shingle roofs with a pitch exceeding 4:12 (approximately 18.4 degrees) have a surface friction coefficient below 0.6. You must purchase a full-body fall protection harness that meets OSHA standards, with a procurement budget between $150 and $250. The static breaking tensile strength parameter of the load-bearing metal D-ring and the polyester nylon main lifeline must exceed 5,000 lbs (about 2,268 kg) to catch a 90 kg adult falling at an acceleration of 9.8 meters per second. The anchor bracket needs to be driven into the 1.5-inch thick solid wooden beam dead center of the roof ridge using three 1/4-inch diameter, 3-inch long hex screws.
A 6-foot (about 1.8 meters) shock-absorbing lanyard that fully deploys within 0.5 seconds of a slip can drastically reduce the maximum arresting force impacting the human skeleton from 1,800 lbs down to below 900 lbs (about 408 kg).
The self-locking rope grab connected to the harness must maintain 100% sliding smoothness on a 5/8-inch (16 mm) diameter vertical lifeline, ensuring the working radius for construction remains between 15 feet and 20 feet (4.5 to 6 meters), which reduces the time consumed by repeated unhooking and rehooking by 20%. The metal carabiner must undergo a 48-hour salt spray anti-rust test, and its spring rebound force must be maintained above 15 newtons, ensuring a 0.1-second instant lock rate across a temperature span from -10°C to 50°C.
Prepare Electrical Testing Instruments
To measure the 370-volt DC open-circuit voltage generated by the series connection of ten 400-watt monocrystalline panels, the safety rating of a handheld digital multimeter must meet the CAT III 1000V or CAT IV 600V industrial certification standards. When inserting the 2 mm probes of the test leads into the positive and negative MC4 connectors, the display precision of the voltage reading must reach 1 decimal place, and the test error rate must be controlled within a ±0.5% range. Detecting a DC circuit with an operating current of 12.9 amps requires pairing it with a DC clamp meter with a 30 mm jaw opening to read the actual magnetic induction current passing through within 2 seconds without cutting the 4 square millimeter cable.
Testing the health of the insulation layer on the roof cables requires a megohmmeter with a 500-volt or 1000-volt DC output. After continuous measurement for 60 seconds, the insulation resistance reading displayed on the screen must be greater than 1 megohm (1 MΩ) to meet grid connection compliance requirements.
Purchasing a kit containing a high-frequency wire tracker and a non-contact voltage tester, costing an extra $80 or so, can detect AC electric fields in the air 2 to 3 cm away from live busbars. When the instrument senses AC voltages ranging from 90 volts to 1,000 volts, it will use a buzzer alarm frequency of over 85 decibels combined with a 5 Hz flashing red LED light, preventing 99% of accidental high-voltage arc flash accidents.
Rent a Material Hoist
A 400-watt panel with an area of 1.95 square meters weighs 48 lbs (about 21.8 kg). Renting an electric aluminum platform hoist with a maximum payload capacity of 400 lbs (about 181 kg) costs around $80 to $120 per day. The winch of this transport machine is powered by a 1.5 horsepower 120-volt AC motor, and it can smoothly transport a stack of 3 modules to a roof edge 15 feet (about 4.5 meters) off the ground in 20 seconds at a speed of 60 feet (about 18 meters) per minute. Manually climbing and carrying up a 60-degree angled aluminum extension ladder will cause physical exhaustion to rise exponentially with each trip, and by the 5th trip, the heart rate will exceed 150 beats per minute.
Using an electric material hoist instead of pure manual labor from 2 workers can complete the vertical hoisting of a total of 218 kg of modules within 45 minutes, compressing the probability of panel frame denting and glass micro-cracks from 15% down to below 0.1%.
The ratchet straps used to tie down the panels and the ladder base must have a polyester webbing width greater than 25 mm, and a working load limit (WLL) of over 500 kg. The applied 60 kg tightening pressure must be evenly distributed across force points located 20 cm away from the four corners of the panel frame. This prevents a 20-degree yaw sway during the ascent, ensuring the carriage cart achieves a 100% straight-line climb on the two track rails spaced 45 cm apart.
Step-by-Step Installation Guide
Snap Chalk Lines
To lay ten 1722 mm by 1,134 mm 400-watt monocrystalline panels on a 30-square-meter roof, the first step is to use a chalk box filled with blue powder to snap the installation baselines. The thickness of the chalk line should be controlled between 1.5 mm and 2.0 mm, ensuring the marking trail remains clearly visible from 3 meters away under bright sunlight.
Use an ultrasonic stud finder to locate the hidden wooden trusses beneath the 12 mm thick asphalt shingles. The standard truss spacing in US homes is typically 16 inches (about 40.6 cm) or 24 inches (about 61 cm).
To comply with local fire department setback regulations, the top of the roof ridge must leave a 3-foot (about 0.9 meters) wide smoke ventilation path, and the left and right edges of the roof must also each reserve a 1.5-foot (about 0.45 meters) blank maintenance area. When measuring, the pulling force on the tape measure should be maintained at around 5 kg to prevent the soft tape from sagging, which would cause the diagonal error of the entire array to exceed 10 mm. If working on a 20-degree sloped surface, the two ends of the chalk line need to be temporarily secured with two 2-inch long steel nails, preventing the 1.5-newton vibration during snapping from shifting the powder more than 0.5 cm away from the original coordinates.
Secure the Brackets
After finding the center points of the wooden trusses, take an 18-volt brushless drill equipped with a 5/16-inch (about 8 mm) diameter high-speed steel twist bit to drill pilot holes. The angle error of the drill bit perpendicular to the roof plane must be less than 3 degrees, and the downward physical weight applied should be kept between 10 kg and 12 kg.
The drill speed should be set at 1,200 RPM, and the absolute downward drilling depth needs to reach 70 mm, which can clear out over 90% of the sawdust inside the solid wooden beam. After pulling out the drill bit, immediately inject 10 ml to 15 ml of outdoor-grade polyurethane waterproof sealant into the hole. The curing time for the gel is approximately 45 minutes at 25°C.
Take a 4 mm thick aluminum alloy L-bracket (commonly known as an L-foot), align it with the hole, and place a 25 mm diameter EPDM (ethylene propylene diene monomer) waterproof rubber washer on it. Using a mechanical torque wrench with a 3/8-inch drive head, clockwise drive an 80 mm long, 8 mm diameter 304 stainless steel lag bolt into the wooden beam. The final applied torque value must lock within the 15 Nm to 20 Nm range. After all 40 brackets are installed according to this standard, the vertical pull-out resistance of a single bolt will reach 450 kg, capable of withstanding the tearing pull of wind gusts up to 130 mph (about 209 km/h).
Lock Down the Rails
Place two extruded aluminum rails, 3.5 meters long and 2.5 mm thick, flat next to the secured L-brackets. The cross-sectional area of the rails is typically designed as 40 mm by 40 mm, which can withstand a static downward pressure exceeding 150 kg across a 1.2-meter span between two support points.
The workers use M8 stainless steel T-bolts to connect the rail slider track to the L-brackets, setting the tightening torque of the nuts to 14 Nm. The vertical height from the bottom of the rails to the surface of the asphalt shingles must be maintained between 10 cm and 15 cm. This gap allows natural winds of 0.5 to 2.0 meters per second to circulate beneath the panels, bringing the operating temperature of the monocrystalline silicon cells down from 65°C to 55°C in the summer.
For every 10°C drop in temperature, the power output of the 400-watt panels can recover about 4% of physical heat loss. When splicing two rails together, a 150 mm long aluminum alloy connector must be used in the middle, mandatorily leaving a 20 mm gap for thermal expansion and contraction. The absolute spacing between two parallel rails is generally set to half the length of the panel, which is about 860 mm, and the vertical parallelism error must absolutely not exceed 5 mm over a 3-meter length.
Hoist the Panels onto the Roof
When an anemometer indicates that the ambient wind speed exceeds 15 mph (about 24 km/h), the hoisting of modules with an area of 1.95 square meters must be stopped immediately. Two workers wearing non-slip safety shoes exert force together, lifting the heavy 21.5 kg 400-watt panel off the ground at a 30-degree tilt angle.
After placing the panel frame onto the rails, the outer edges of the first and last panels at both ends must leave a full 50 mm clearance from the physical cut ends of the rails. Workers use 35 mm thick aluminum alloy end clamps to grip the panel edges, fitted with M8 hex socket screws.
Aluminum mid-clamps are inserted between two adjacent panels. The physical structure of the mid-clamp will automatically squeeze out a standard 20 mm wide gap between the two panes of glass, which serves to release material stress caused by drastic environmental temperature changes from -10°C to highs of 40°C.
Fastener Type | Compatible Panel Thickness | Screw Specs | Recommended Torque | Spacing/Margin Standard | Single Point Slip Resistance |
End Clamps | 30mm - 35mm | M8 x 40mm | 14 Nm | 50mm from rail end | 250 kg |
Mid Clamps | 30 mm - 35 mm | M8 x 50 mm | 14 Nm | 20 mm panel gap | 300 kg |
Rail Splicer | 40 mm x 40 mm | M8 x 20 mm | 16 Nm | 20 mm expansion gap | 400 kg |
Pure Copper Grounding Lug | Fits rail channel | M6 x 15 mm | 6 Nm | 1 at the start of each rail row | N/A |
Plug in the Connectors
From the junction box on the back of each 400-watt module, two 1.2-meter long, 4 square millimeter (10 AWG) DC cables are routed out. One comes with an MC4 male connector and the other with an MC4 female connector. Horizontally align the positive and negative connectors of two adjacent panels and forcefully push them in; when the built-in polycarbonate plastic clips engage, there will be a crisp "click" sound.
This sound indicates that the waterproof and dustproof rating of the connector has officially reached the IP68 industrial standard, capable of withstanding continuous submersion under one meter of water without short-circuiting or leaking electricity. After connecting ten panels with an operating voltage of 31 volts and an operating current of 12.9 amps in series sequentially, the system's DC operating voltage will stack up to 310 volts.
To prevent 20 years of sun and wind exposure from wearing down the wire insulation, the suspended cables must be tightly tied to the inner grooves of the aluminum alloy rails every 1.5 meters using UV-resistant nylon cable ties with a tensile strength of 50 lbs (about 22.6 kg). The bending radius of the cables at corners must absolutely not be less than 40 mm. If forced into a 90-degree right angle, the internal 56 strands of 0.3 mm tinned copper wire will suffer from metal fatigue and break within 3 years, causing the entire string's 12.9-amp current to be instantly cut off.