How to properly maintain poly solar modules: 5 seasonal maintenance steps
Winter clear snow within 48hrs to prevent hot spots; spring check junction boxes (<65°C); summer rinse monthly (0.3MPa max); autumn sweep debris; monitor voltage drift (>5% prompts repair) for poly module upkeep.
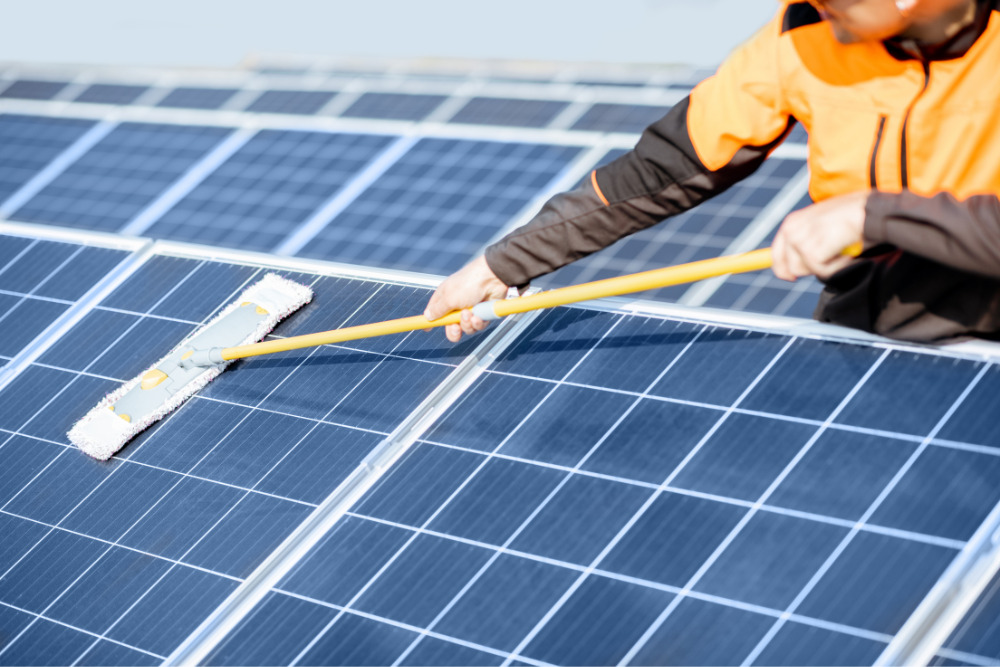
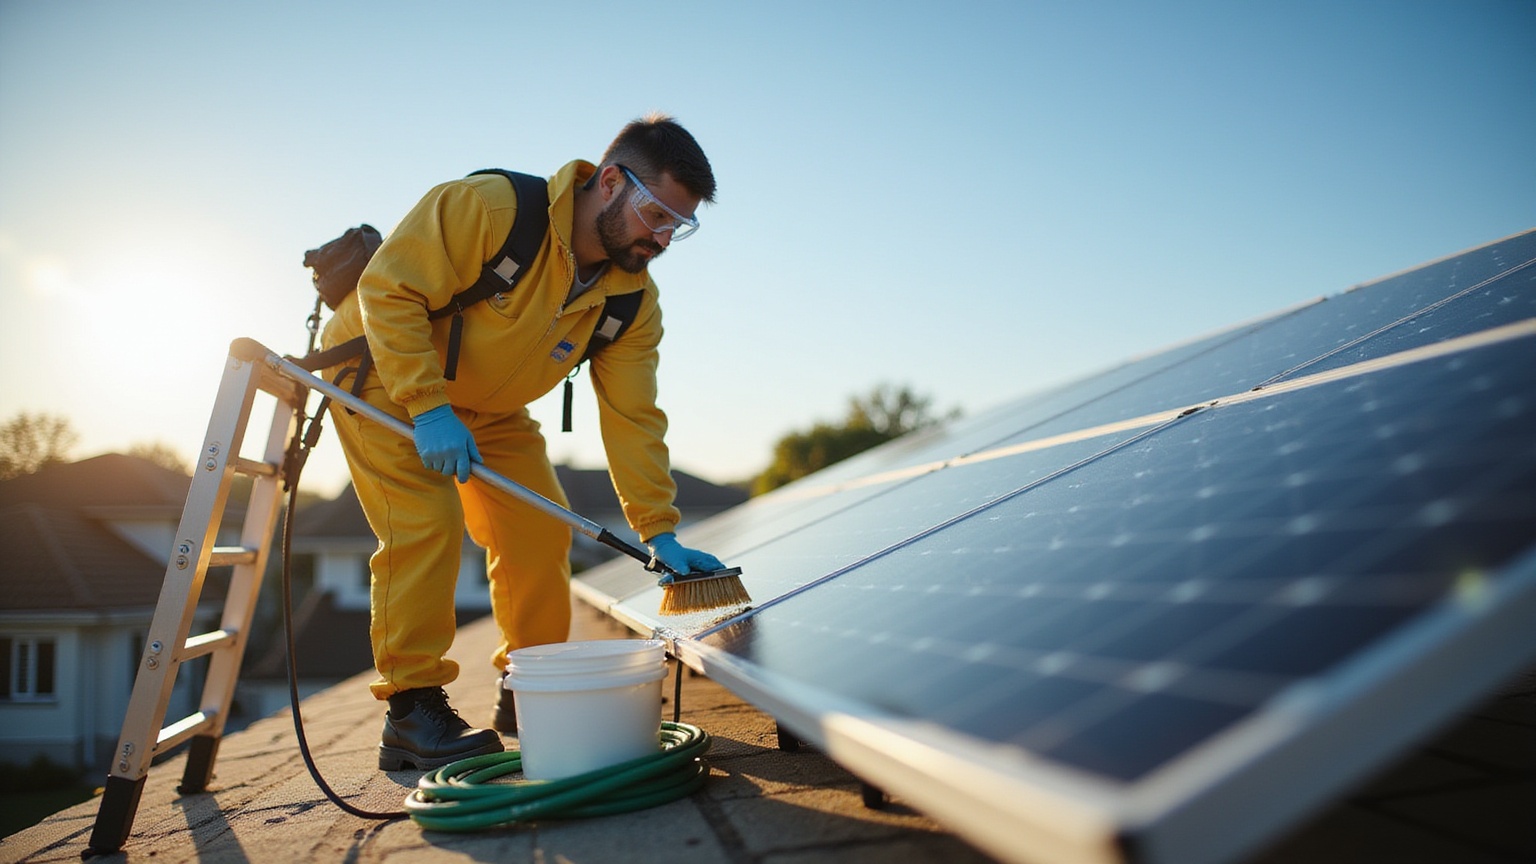
Cleaning Modules in Spring
After a winter of exposure to grime, pollen, and minimal rain, a typical residential array can see an efficiency loss of 5% to 15% just from surface contamination. For a 10 kW system, that translates to 500–1500 watts of potential power literally left on the table every sunny afternoon. The good news is that a single, proper cleaning can restore this lost output almost immediately. The return on investment is clear: spending 60 to 90 minutes on cleaning can yield a 1% to 3% boost in your system's annual energy production, which for most households means recapturing enough electricity to power several loads of laundry or charge an electric vehicle.
A common mistake is using a high-pressure washer, but the seals around the panel frames are only rated for a certain pressure; keep water pressure below 40 psi to prevent forcing moisture into the electrical modules. A garden hose nozzle set to a gentle "shower" setting typically delivers between 20-30 psi, which is ideal. For stubborn spots like bird droppings or hardened sap, a solution of 2-3 ounces of mild, soap-free detergent (like Dawn dish soap) per 5 gallons of water is sufficient. Avoid harsh chemicals, abrasive pads, and metal scrapers at all costs, as they can permanently scratch the anti-reflective coating on the glass, which alone can cause a permanent 1-2% drop in light transmission.
Always perform cleaning early in the morning, in the evening, or on a cool, overcast day. Cleaning panels that are hot from the sun, often reaching 140°F (60°C) or more, causes the water and any cleaning solution to evaporate almost instantly, leaving behind soapy streaks and water spots that can themselves reduce efficiency. These streaks act as a new layer of dirt, scattering light. Furthermore, working on a cool array is safer for you and prevents thermal stress on the glass. After applying your cleaning solution with the soft brush, use a final rinse with pure water to wash away any residue. The entire process for an average-sized rooftop array of 20-30 panels should take one person no more than 90 minutes. The immediate result will be visible on your monitoring app: a sharper, higher peak in your power generation curve the next sunny day, often showing a 10-20% instant increase compared to the pre-cleaned, soiled state.
Checking for Summer Airflow
Polycrystalline solar modules experience a measurable drop in efficiency as they heat up, typically around -0.3% to -0.5% for every degree Celsius above the standard test temperature of 25°C (77°F). On a 95°F (35°C) day, with solar irradiation adding ~75°F (~24°C) of heat, panel surface temperatures can easily exceed 150°F (65°C). At this temperature, a panel's output can be 12-20% lower than its rated capacity.
The most critical factor for cooling is maintaining a clear path for air to move beneath the panels. A minimum gap of 4 to 6 inches (10 to 15 cm) between the panel frames and the roof surface is essential for effective passive ventilation.
The most common issue is vegetation; a tree branch that was 3 feet away last year may now be touching the racking, acting as a heat trap. Trim any foliage back to at least 2 feet (0.6 meters) from the array's perimeter. Next, check for accumulated debris on the roof itself, particularly near the lower edge of the panel rows. A pile of leaves or pine needles 2 inches high can act as a dam, blocking the cool air that should flow in from the eaves. Similarly, check for bird or animal nests under the panels, which are a double concern as they block airflow and can cause physical damage. If your system uses DC optimizers or microinverters mounted directly beneath the panels, ensure they are not completely sealed against the roof deck; they require some air movement to dissipate their own heat, which can be 5-10°F (3-5°C) higher than the ambient air.
A consistent 5-10% power deficit in the central panels is a strong indicator of a heat buildup issue, as they have the least exposure to cooling breezes. The most direct method is to measure the panel temperature. A affordable infrared thermometer (~30−50) can instantly show the problem. Point it at the backsheet of different panels around 2-3 PM on a sunny, windless day. Panels with good airflow should ideally be within 35°F (20°C) of the ambient air temperature. If you measure a temperature differential of 50°F (28°C) or more, it confirms that heat is being trapped. This isn't just an efficiency issue; sustained high temperatures above 185°F (85°C) can accelerate the degradation rate of the silicon cells, potentially reducing the module's 25-30 year lifespan.
Removing Fall Leaves and Debris
A partial shade covering as little as 10% of a single panel can reduce the output of entire string of panels by 30-50% due to how series wiring affects the electrical current. The financial impact is direct; for a system that normally generates 40 kWh on a clear fall day, this loss equates to 12-20 kWh of electricity you now must purchase from the grid. Furthermore, when wet, a 1-inch thick layer of maple leaves plastered against the lower edge of a panel acts as both a shade and a moisture trap, promoting mold growth and creating a microenvironment that can accelerate corrosion on aluminum frames over the system's 25-year lifespan.
The most critical area to monitor is the bottom 6 inches (15 cm) of the panel rows, as debris naturally slides and collects there, blocking the lower rail and creating a dam that can also impede the drainage of rainwater. You should perform a visual inspection at least once per week during peak leaf drop in your area. The goal is to prevent the formation of a dense, compacted layer.
· Inspect from the ground first, using binoculars on a sunny day. Look for sharp shadows or dark patches on the panels, which indicate debris accumulation.
· Check your monitoring system data. A consistent 15% or greater drop in the morning or afternoon output of a specific string compared to others is a clear digital signal of a shading issue.
· Feel the panels (carefully) on a cool day. A section of a panel that remains cold and damp hours after the sun has hit the array is likely covered by debris blocking both light and airflow.
For the cleaning itself, using the correct tool is 80% of the work and ensures both safety and effectiveness. A soft-bristled roof brush with an extension pole is the ideal tool, allowing you to work from the ground or a stable ladder position without walking on the roof. The following table compares the effectiveness of common tools for this specific task:
Tool | Effectiveness for Leaf Removal | Risk of Damage | Best Use Case |
Soft Roof Brush (18-inch width) | High (95%) | Very Low (1/10) | Safely sweeping loose leaves and light debris off large areas from the ground. |
Leaf Blower | Medium (60%) | Low (3/10) | Removing dry, loose leaves from easily accessible, flat/low-angle arrays. |
Garden Hose Spray | Low (40%) | Medium (5/10) | Can create a pasty, stuck layer if leaves are wet; risks forcing water into seals. |
Your Hands (on ladder) | High (90%) | High (7/10) | For removing large, stuck twigs or piles; high fall risk and potential for glass damage. |
For stubborn, wet leaves that are stuck, a gentle spray with a hose to loosen them first is acceptable, but keep the water pressure below 30 psi. The entire process for a ~5 kW residential system should take less than 30 minutes per cleaning session. By addressing debris promptly, you prevent the compounding issues of shade, moisture retention, and potential for corrosion, ensuring your system operates at close to 95-98% of its clear-sky potential throughout the autumn season.
Clearing Snow Off in Winter
A mere 0.1 inch (2.5 mm) dusting of snow can reduce energy production to zero by blocking 99% of sunlight. A heavier, wet snow load of 6 inches (15 cm) can weigh over 3 pounds per square foot (15 kg/m²), adding significant stress to your roof and racking system. However, the decision to clear snow is not always straightforward. A key advantage of modern black solar panels is that they absorb heat; even on a 20°F (-7°C) day, the dark glass surface under a thin layer of snow can reach 32°F (0°C), causing the bottom layer to melt and slide off. The panels' slick surface and typical installation angle of 15 to 40 degrees aid this natural shedding. The goal of manual clearing isn't to achieve a perfectly clean array after every flurry, but to strategically remove snow after major storms that deposit 4 inches (10 cm) or more, especially if the snow is wet and dense, to reclaim days or even weeks of lost generation during the short daylight hours of the season.
Safety is the non-negotiable first step. Never climb onto a snow-covered roof. The risk of a fall far outweighs the benefit of any recovered energy. Your entire clearing operation must be planned from the ground using an extension pole.
· Assess the snow type. Light, powdery snow under 20°F (-7°C) often blows off easily and may only need a single gentle tap on the panel frame. Heavy, wet "heart-attack" snow requires a different, more careful approach.
· Check your monitoring app. If the sun is out and your neighbors' arrays are producing but yours shows zero, it's a clear sign to act. If it's cloudy, the energy gain from clearing will be minimal.
· Plan your escape route. Stand clear of the avalanche zone. When you clear the bottom panel, the snow from the panels above will often slide down in a single, heavy sheet.
The tool you select dramatically impacts safety and effectiveness. A rigid plastic snow rake with a foam-covered head is essential to prevent glass scratches. The following table compares common approaches:
Tool / Method | Effectiveness (1-10) | Risk of Damage (1-10, 10=high) | Best Use Case |
Plastic Roof Rake (10-20 ft pole) | 9 | 2 | Safely clearing the bottom 1-2 feet of the array to initiate a natural slide. |
Broom (from ladder) | 5 | 6 | Only for low, ground-level arrays; high fall risk and uneven pressure on glass. |
Garden Hose with Warm Water | 2 | 10 | Never use. Creates an instant ice rink on the panels and ground below. |
Waiting for Natural Thaw | 7 | 1 | The best option for dustings under 2 inches or when temperatures will rise above freezing within 24 hours. |
Often, the entire sheet of snow, several inches thick, will release and slide off the array in one motion within 30-60 seconds. If it doesn't, you can clear a 6-inch (15 cm) high strip along the entire bottom edge. This is often sufficient for the sun to heat the exposed black glass, which then melts the remaining snow from underneath. It's a race against time; on a sunny day, clearing the bottom edge by 9:00 AM can yield 4-5 hours of full power production, potentially adding 10-15 kWh to your day's total. However, if the forecast calls for overcast skies with a high below 25°F (-4°C), the energy gain may be less than 1 kWh and likely not worth the effort. The key is intelligent intervention: using minimal, safe force to trigger the panels' own self-cleaning design, turning a 100% loss into 80-90% of a winter day's potential output.
Inspecting Cables and Connections Year-Round
More critically, a high-resistance connection can heat up to 150°C (302°F) or more, creating a fire hazard and potentially melting connector housings, a repair that can cost 200−500 for an electrician. Furthermore, water intrusion into a MC4 connector can lead to a "ground fault," causing the entire system to shut down until the 100−300 fault is diagnosed and repaired. A bi-annual, 10-minute visual inspection can identify 90% of these issues before they lead to performance degradation or safety hazards.
Your goal is to look, listen, and smell for obvious warning signs. Listen for a faint 60 Hz AC hum from the inverter, which is normal, but a loud, intermittent buzzing from the DC disconnect or combiner box can indicate a loose terminal. Smell for a sharp, acidic odor of overheating plastic, a sure sign of a failing module. Use your hand to feel the air around conduit connections and the inverter's exterior housing; a surface temperature that is uncomfortable to touch (above ~140°F or 60°C) suggests excessive heat buildup from poor connections inside. For the wiring itself, perform a visual check from the ground. Cables should be secured every 18-24 inches (45-60 cm) to the racking with UV-resistant zip ties, with no sharp bends tighter than a 5-inch (12.7 cm) radius.
The most critical elements are the connectors themselves. The industry-standard MC4 connectors are designed to be water-tight, but their seals can degrade after 10-15 years of UV exposure and thermal cycling. Check that the male and female connectors are fully "clicked" together; you should not see any exposed metal contact. A gap of even 1-2 mm can let in moisture. Look for signs of green or white corrosion around the connector joints, which is a clear indicator of water ingress. The most valuable tool for this inspection is your system's monitoring data. Log in and check the "String Voltage" and "String Current" readings for each branch of your system around solar noon on a clear day. A voltage reading on one string that is consistently 5-10 volts lower than the others of the same length suggests a faulty connection or a problem with a bypass diode. A current reading that is 0.5-1.5 amps lower points to a different issue, like shading or a mismatched panel.
Symptom (Visual/Data) | Possible Fault | Immediate Risk | Long-Term Impact |
Intermittent system shutdowns on sunny days | Loose connection in combiner box | High: Arcing and heat buildup | 10-15% annual energy loss, potential fire hazard |
10V lower string voltage vs. identical strings | Corroded or oxidized MC4 connector | Medium: Progressive resistance increase | 3-8% power loss in that string, eventual arc fault |
Visible green corrosion on connector | Failed rubber seal allowing water ingress | Medium-High: Ground fault risk | 100% string shutdown, 150−250 repair cost |
Burned plastic smell near inverter | Overheated DC terminal | Critical: Immediate fire hazard | Total inverter failure (1,500−3,000 replacement) |
If you identify any of these issues, the safest course of action is to contact your installer. For a homeowner comfortable with basic electrical work, the corrective action for a suspect connector involves shutting down the entire system (AC and DC), verifying no voltage is present with a multimeter, disconnecting the faulty connector, cleaning the contacts with electrical contact cleaner, and replacing the connector with a proper, manufacturer-approved crimping tool. Never simply tape over a damaged connector. This 30-minute repair, with 20 inparts,can prevent a 500 service call and recover $40 worth of lost electricity per year.