How to clean solar modules efficiently: 5 time saving techniques
Clean with a soft brush and deionized water (5L/m²) quarterly, avoiding midday heat to prevent cracks; gentle post-rinse wiping removes 90% dust, boosting output 5-8% efficiently without damage.
Pick the Right Tools
Studies by the National Renewable Energy Laboratory (NREL) indicate that improper cleaning methods can permanently reduce a system's annual energy output by 3% or more. For a typical 6 kW residential system, that’s a loss of around 75to120 per year, depending on local electricity rates. The initial setup cost for proper cleaning tools is often between 150 and 400, meaning the investment can pay for itself in under two years simply by preventing this avoidable damage.
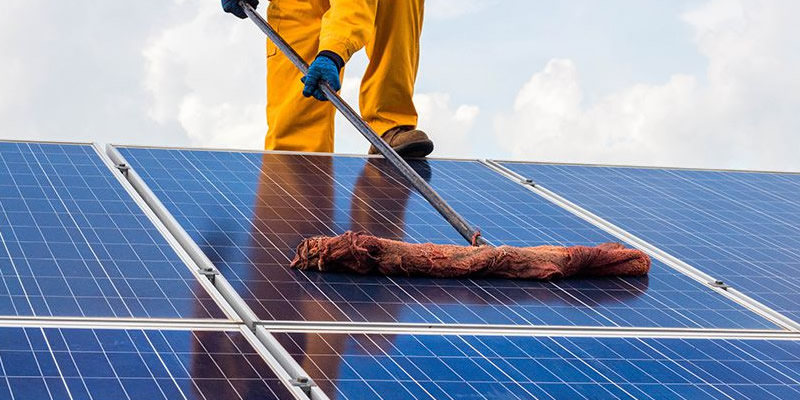
You need one specifically designed for solar panels, which features soft, non-abrasive bristles, typically made from synthetic materials like polypropylene. The bristles should be at least 16 inches (40 cm) long to effectively reach across the surface. A brush with a rotating head is a significant advantage, as it allows the tips of the bristles to glide over the glass with minimal friction, rather than scraping across it. The brush should connect to a water-fed pole, which brings us to the water source. While a standard garden hose can be used for a preliminary rinse, the final rinse should ideally use purified water. Why? Tap water contains dissolved minerals—typically 50 to 400 parts per million (ppm) of Total Dissolved Solids (TDS). When this water evaporates on the hot glass, it leaves behind spotty mineral deposits that block sunlight, undoing your cleaning work. Using a purification system that produces water with less than 10 ppm TDS ensures the panels dry spot-free.
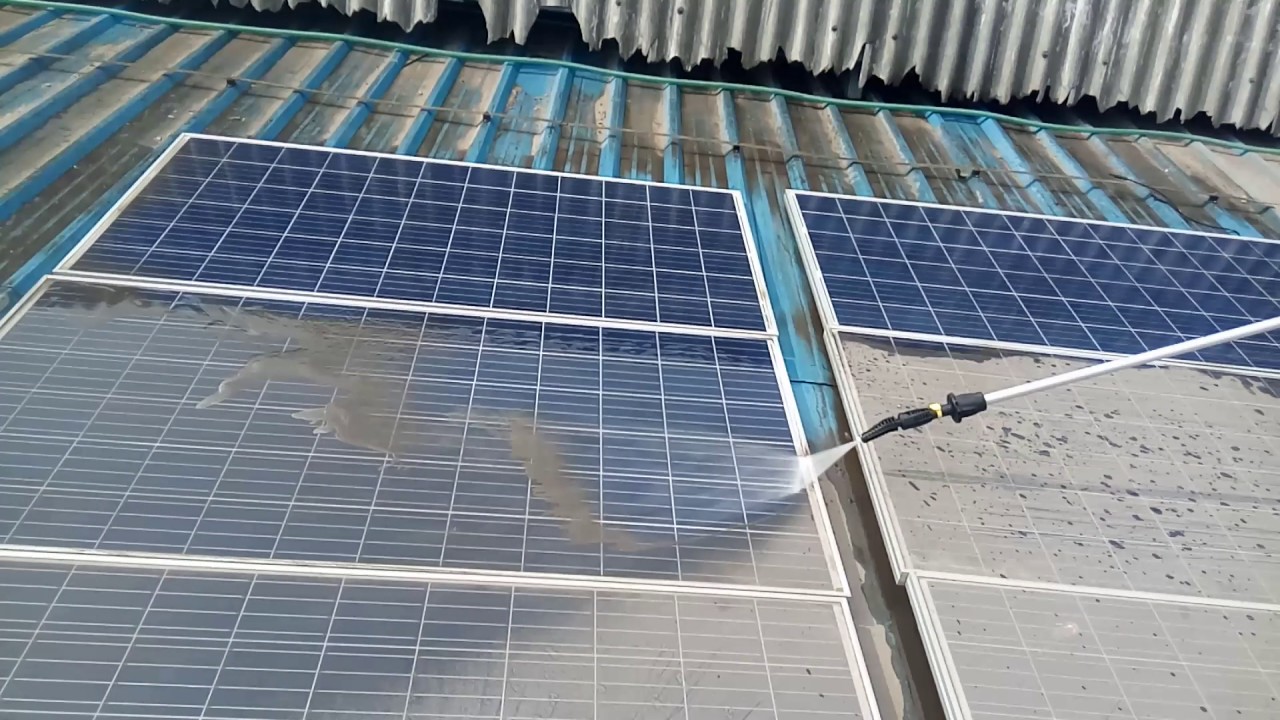
A common mistake is using a pressure washer. The high-pressure stream, often exceeding 1,500 psi, can force water past the protective seals around the module's frame, damaging the internal cells and voiding the manufacturer's warranty, which typically lasts 25 years. The maximum pressure should never exceed 500 psi.
A pole that extends to 12-18 feet (3.5-5.5 meters) allows you to safely clean most single-story ground-mounted or rooftop arrays without a ladder, significantly reducing the time and risk involved. For two-story homes, a pole extending to 24-30 feet (7-9 meters) is necessary. A good pole is lightweight, often made of carbon fiber, to reduce arm fatigue during a cleaning session that might last 60 to 90 minutes for an average-sized array. Finally, the water flow rate matters. You need enough volume to rinse away loosened grime effectively. A flow rate of 1.5 to 2.5 gallons per minute (gpm) is ideal, providing a balance between effective cleaning and water conservation.
Clean at the Coolest Time
When a panel operates in full sun, its surface temperature can easily be 55-65°F (30-35°C) hotter than the ambient air temperature. A panel sitting at 150°F (65°C) is under significant thermal expansion. Spraying cold water—which might be 50-60°F (10-15°C) from a garden hose—onto this super-heated glass creates a rapid thermal shock. This repeated stress can, over time, contribute to micro-fractures in the silicon cells or delamination of the protective layers, potentially reducing the module's 25-year lifespan. Furthermore, water evaporates almost instantly on a hot surface, leading to rapid streaking and mineral spotting that negates the cleaning effort. Cleaning during the cooler parts of the day is a simple, zero-cost technique that can improve your cleaning efficiency by up to 50% while safeguarding your system's performance.
At this time, panel temperatures are typically within a few degrees of the ambient temperature, which might be 60-70°F (15-21°C). This temperature range is ideal. The surface is cool enough that water clings to the glass for a longer period, approximately 3-5 minutes instead of evaporating in under 60 seconds, giving you ample time to scrub and rinse effectively. This results in a streak-free finish with significantly less water. In fact, you can reduce your water consumption by an estimated 30-40% simply by avoiding the peak evaporation rates of the midday heat.
The worst time to clean is between 10:00 a.m. and 3:00 p.m., when the sun's intensity is at its peak, often exceeding 1000 W/m². During this period, the risk of thermal shock is highest, and the cleaning process becomes highly inefficient. The rapid evaporation means you might need to use twice the volume of water to achieve the same rinsing effect. The temperature differential between the hot glass and the cool water can exceed 100°F (38°C), creating a significant physical strain on the materials.
Time of Day | Estimated Panel Surface Temp. | Cleaning Efficiency | Primary Risk | Water Usage (Relative to Morning) |
Early Morning (dawn-8 a.m.) | Near ambient, ~65°F / 18°C | High (90-95% effective) | Low (if panels are dry before sun) | Baseline (1x) |
Late Afternoon (after 5 p.m.) | Moderately warm, ~85°F / 29°C | Moderate-High (80% effective) | Medium (if dew forms overnight) | ~1.2x |
Overcast Day | Slightly above ambient, ~75°F / 24°C | High (85-90% effective) | Low | ~1.1x |
Midday (10 a.m.-3 p.m.) | Very Hot, >120°F / 49°C | Low (<60% effective) | High (Thermal Shock, Streaking) | ~1.8-2x |
For most residential systems, a full cleaning takes about 60 to 90 minutes. Planning this task for a 7:00 a.m. start on a Saturday morning will yield the best results. The energy production loss from cleaning during this low-light period is negligible, often less than 0.5 kWh for a typical system, compared to the several kilowatt-hours you would forfeit by shutting down the system during peak production hours.
The Drag-Through Method
Many DIY solar panel cleaning attempts waste time and water through inefficient patterns, like circular scrubbing or random swipes. This common approach can increase water usage by up to 25% and often leaves behind visible streaks, reducing the cleaning effectiveness to below 70%. The "Drag-Through" method offers a systematic alternative designed for maximum efficiency. This technique focuses on preventing recontamination by ensuring that dirt and dirty water are pushed off the panel in a single, controlled direction, rather than being spread around. For a typical residential array of 20 panels, adopting this method can cut the active cleaning time from 90 minutes down to about 50-60 minutes, a time saving of approximately 30-40%. It also conserves water, reducing consumption from an average of 2-3 gallons per panel to just 1-1.5 gallons, by leveraging the lubricating effect of the water film effectively.
The core principle is to work in a linear, overlapping pattern, much like a windshield wiper, but with a crucial modification: the brush is lifted at the end of each stroke. Here is the step-by-step breakdown:
l Step 1: Initial Rinse. Lightly spray a 2-foot wide (0.6-meter) section along the top edge of the panel with purified water for about 5 seconds. This pre-wets the surface, loosening coarse debris.
l Step 2: The Drag Stroke. Place your soft-bristled brush at the top of the wet section. Using the telescopic pole, drag the brush steadily and slowly across the panel's width in a straight line. Maintain a constant speed of about 1 foot per second (0.3 meters/sec). The goal is to cover the panel's ~5-foot width in about 5-6 seconds.
l Step 3: The Lift-Off. As the brush reaches the opposite edge of the panel, continue its motion another 6 inches (15 cm) into the air, then lift it completely off the surface. This "flicking" action throws the accumulated dirty water and debris clear of the panel and the roof.
l Step 4: The Return and Overlap. Do not drag the brush back across the dry or partially cleaned area. Instead, return it through the air to the starting side, overlapping the previous wet path by about 2-3 inches (5-8 cm). This overlap is critical; it ensures no strip of dirty surface is missed.
l Step 5: Repetition and Final Rinse. Repeat steps 2 through 4, working from the top of the panel to the bottom. Once the entire panel has been scrubbed, perform one final, continuous rinse from top to bottom with a steady flow of pure water to remove any remaining residue.
Applying more than 5-10 pounds of downward pressure is unnecessary and increases friction. The brush's own weight, combined with the lubricating water film, does ~90% of the cleaning work. The primary function of your arm movement is guidance, not force. The angle of the brush is also critical. A head that rotates freely on a 15 to 20-degree pivot will maintain optimal contact with the glass surface, compensating for the natural arc of your pole movement. This consistent contact angle is what ensures a uniform clean without streaks. The entire process for a single 65-inch by 39-inch (1.6m x 1.0m) panel should take no more than 2-3 minutes from start to finish.
Work from the Top Down
A seemingly logical approach to cleaning a solar array is to start with the most accessible panels first, often those at the bottom. However, this method creates a recurring problem of recontamination that can reduce the overall cleaning efficiency by up to 30%. When you clean a lower panel first, the dirty water, along with dissolved grime and abrasive particles, flows down onto it from the panels above. This contaminated runoff, which can have a sediment concentration of 500-800 ppm (parts per million), creates a muddy slurry that you then have to clean again, effectively doubling your work for the same surface area. This not only wastes an additional 10-15 gallons of water for an average-sized system but also increases the risk of microscratches as you scrub the now-gritty surface.
The correct sequence is non-negotiable for a streak-free, efficient clean. You must always start at the highest point of your array and work your way down, row by row. Here is the precise workflow:
l Step 1: Rinse the Top Row. Begin by giving the top row of panels a 30-second preliminary rinse with purified water to loosen dust and debris.
l Step 2: Clean the Top Row. Using the "Drag-Through" method, thoroughly scrub and rinse the entire top row of panels. For a row of 4 panels, this should take approximately 8-12 minutes.
l Step 3: Proceed Downward. Move to the row immediately below the one you just finished. The clean water running off from the top row will have pre-rinsed the second row, reducing the scrubbing effort required by about 15%.
l Step 4: Repeat the Process. Continue this process, completing each full row before moving to the one beneath it.
Water flow follows gravity at a rate of approximately 1.5 to 2.0 gallons per minute from a standard hose. By controlling the source of the water at the top, you dictate the path of the runoff. If you have a tilted array with a 20-degree pitch, water will flow down the ~5-foot length of a panel in under 15 seconds. This means that within a minute of finishing the top panel, the one below it is already wet with relatively clean water. This strategic approach cuts down the total cleaning time by minimizing redundant scrubbing passes. You will typically need only one effective scrubbing pass per panel instead of the two or three that might be required if you are constantly fighting dirty runoff. Furthermore, this method ensures a final rinse with pure water. As you finish the bottom row, the clean water flowing down from the freshly cleaned panels above provides a consistent, spot-free drying pattern. The entire system dries uniformly, which is critical for achieving a >95% clarity rating immediately after cleaning. Adhering to this top-down sequence is a simple discipline that transforms a messy, inefficient chore into a streamlined process, directly contributing to a faster recovery of your system's optimal power output, often reaching 98-99% of its rated capacity within hours.
Use Purified Water if Possible
The concentration of TDS in tap water varies widely, from 50 ppm in soft water areas to over 400 ppm in regions with very hard water. When this mineral-rich water dries on a panel, it creates a faint, opaque film that can block between 1% and 3% of incoming sunlight immediately after cleaning. Over a year, this seemingly small loss can add up to a significant amount of unrealized energy. For a 7 kW system in a sunny climate, a 2% persistent loss equates to roughly 40−60 in annual electricity value that you're not generating. Purified water, with a TDS level below 10 ppm, eliminates this problem entirely by leaving zero residue upon evaporation.
With tap water, you often need to use a squeegee or a second rinse to minimize spotting, a step that adds at least 2-3 minutes per panel and increases the risk of scratches. With purified water, you can simply spray and walk away, confident the panels will dry perfectly clear. This can reduce the total cleaning time for a 20-panel array by 20-30 minutes. The upfront cost of a purification system is the main consideration. A portable, in-line deionizing vessel suitable for home use costs between 150and300 and contains resin that purifies approximately 300 to 500 gallons of water before needing replacement, which costs about 80−120.
Water Type | Typical TDS Level | Final Result | Long-Term Power Impact | Additional Labor Required |
Hard Tap Water | > 180 ppm | White, spotty residue; up to 3% immediate power loss | Cumulative loss from film build-up | High (squeegeeing, re-rinsing) |
Soft Tap Water | 50 - 180 ppm | Light streaking; ~1% power loss | Minor annual energy loss | Moderate (often requires a final wipe) |
Filtered Water | 10 - 50 ppm | Nearly spot-free; < 0.5% power loss | Negligible | Low (usually acceptable) |
Purified (DI/RO) Water | < 10 ppm | Perfectly clear, zero residue | No loss from water quality | None (touch-free drying) |
These units are lightweight, around 10-15 pounds, and are designed for this specific task. The economic calculation is clear: if the system saves you 30 minutes per cleaning and prevents a 2% energy loss, the $200 initial investment pays for itself in well under two years for most homeowners. The process is simple:
l Connect the DI vessel to your water source.
l Attach your cleaning brush to the outlet of the vessel.
l Begin cleaning. The water is purified in real-time as it flows to the brush.