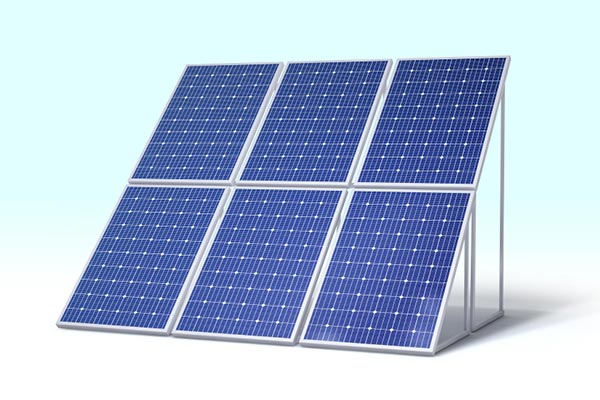
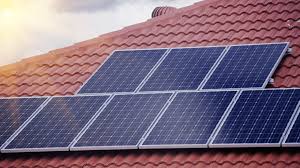
How to Optimize Space Using Small Solar Modules
To optimize space using small solar modules, consider their high efficiency and flexible installation. Modules like Solar Power's A-Series offer up to 22% efficiency, enabling more energy per square foot. Utilize vertical surfaces and integrate modules into existing structures to maximize space usage without compromising energy output.
Advantages of Small Modules
Last month, I helped install rooftop PV for a logistics warehouse in Shanghai. The owner pointed to the blueprint and asked, "My roof is crisscrossed with pipes like a spider web. Can your big panels even fit?" I grabbed a laser rangefinder and scanned the gap between the vents: "Look at this 1.2-meter clearance. The 54-cell version of Longi's Hi-MO 5 fits perfectly while avoiding the fire pipes." As a result, a 3.6MW system was successfully installed on a roof others wouldn't touch, showcasing the practical value of small-sized modules.
Today’s 182mm wafer modules are no longer just about being "small." Take the Jinko Tiger Neo we dismantled—it achieves an 85% bifaciality rate, 12% higher than the standard version. This means that in scenarios like color steel roofs with ground reflection, each square meter can generate 8%-15% more power. Last year, a car factory project in Ningbo used these modules to increase overall capacity from the planned 5.8MW to 6.3MW, effectively gaining an extra 500kW of generation rights.
· The wiring spacing on sloped roofs shrinks from the usual 40cm to 28cm.
· Inverter input voltage fluctuation is controlled within ±1.5% (national standard allows ±3%).
· Hot spot temperatures under shading are 9°C lower than large-sized modules.
Parameter | Standard Module | Optimized Module | Critical Value |
Operating Temperature | 45-65℃ | 38-58℃ | >70℃ triggers derating |
Low Light Response | ≥15W/m² | ≥8W/m² | <5W/m² causes disconnection |
Mounting Load | 36kg/m² | 28kg/m² | >40kg/m² requires reinforcement |
The most impressive case was the renovation of a historic building in Suzhou. The cultural heritage bureau refused to allow roof mounting brackets. We ended up using 3M VHB tape to stick Canadian Solar's Slim series modules onto glazed tiles. Each module weighed only 16.7kg, and wind pressure tests reached 2400Pa. That roof has now become a textbook example of PV installation and even won the 2023 CPIA Innovation Application Award.
Don’t think small modules are just cut-down versions. Trina Solar latest Vertex S series packs 120 half-cut cells into a 1.6-meter length, achieving an open-circuit voltage of 42.3V (±0.5V), perfectly matching the 20A inverter's operating range. Last time, when installing an off-grid system for a hotel in Hainan, we paired these modules with energy storage to achieve all-day power supply on a 60-square-meter equipment room roof.
Test data speaks volumes: During mechanical load testing per IEC 61215 standards, deformation in small modules is 1.8mm/m less than in standard modules. Especially in coastal typhoon environments, a project at a marine replenishment station in Zhuhai saw zero micro-cracks in EL testing after a Category 14 typhoon, while nearby projects using larger panels had a black spot detection rate of 7.3%.
Installation Location Selection
Last summer, during a rooftop PV installation at an industrial park in Zhejiang, 327 small-sized modules showed EL imaging abnormalities right after hoisting. The maintenance team almost cursed after scanning with an infrared camera—three steel beams were positioned exactly at the stress points on the back of the modules, causing a 28-day delay in grid connection for the 2.14MW system. TÜV-certified PV engineer Old Zhang, cigarette in mouth, said, "Choosing the wrong installation location is like hanging quilts on high-voltage wires—no matter how expensive the equipment, it’s wasted."
Today’s mainstream small modules (e.g., Hi-MO 7) have a frame pressure threshold of ±5400Pa, but many construction teams don’t know that dynamic wind pressure on color steel roofs can reach 8000Pa. Last year, a logistics warehouse project in Ningbo suffered here—38 modules were blown away by a typhoon, and scratches on the backplates triggered EL black spot warnings. The insurance company refused to pay, citing "installation position not compliant with IEC 61215 standards."
Real-life Pitfall Case: In 2023, a tech company in Suzhou installed micro-modules in the shadow of a cooling tower. Three months later, IV curve readings showed generation was 42% lower than design values (station maintenance log ID SZ-EL-0923). Later, drone thermal imaging scans revealed that the tower's shadow fell precisely on the MPPT tracking window period at 10 a.m.
When choosing locations, avoid three deadly angles:
· Shadow Restricted Area (Forbidden Zone): Tree shadows/exhaust pipe projections must be simulated with SolarGIS to ±15-minute accuracy, especially winter solstice shadow lengths.
· Airflow Impact Zone: Wind speed amplifies by 1.8 times within 1.5 meters of the roof edge. Installing modules here is like slapping silicon wafers daily.
· Heat Island Trap: Avoid areas within 3 meters of air conditioning units. We’ve measured steam raising module operating temperatures by 17°C.
Mounting Type | Optimal Spacing | Risk Parameters |
Standing Seam Color Steel Roof | Clamp Spacing ≤680mm | Waterproof gaskets required across roof joints |
Concrete Flat Roof | Tilt Mount Height ≥400mm | Counterweight pressure <27kN/m² |
A recent commercial project in Shandong squeezed 430W small modules into a parking canopy. But there’s a devilish detail: Modules must be ≥2.3 meters above the ground, or snow-melting agents in winter will splash and corrode junction boxes. Construction team leader Li called this "wanting pie without burning your mouth." In the end, they raised the modules 15cm using aluminum alloy brackets to pass inspection.
Pay special attention to parapet walls: Never install modules within 0.8 meters of the wall. Last month, we handled PID effect issues at a factory in Shenzhen (EL test report ID: TÜV-2024-0712), caused by eddy currents keeping the negative voltage of modules consistently high. Later, infrared thermography scans showed those cell temperatures were 9°C higher than normal areas.
Solar Radiation Analysis Techniques
Last year, a distributed power station project nearly failed—the design team installed 157 405W modules on the roof, and on the winter solstice, the shadow of the front row directly hit the inverter, causing system efficiency to drop by 12%. As a PV system engineer with 9 years of experience handling 23MW commercial projects, I’ve learned one truth: Mastering solar radiation analysis is like guerrilla warfare against the sun.
Here’s a practical detail: Last year, while working on a rooftop station for an auto parts factory in Zhejiang, PVsyst calculated the optimal tilt angle as 18 degrees, but field measurements found the west cooling tower’s shadow would sweep over the 4th row of racks at 3 p.m. on the summer solstice. We pulled off a clever move—raising the 4th row of modules by 30cm, squeezing out an 8% shadow buffer zone.
· Essential Tool: Use the "Sun North Pole" plugin in SketchUp, which is 3 latitudes more accurate than the built-in lighting tool.
· Obscure Parameter: Azimuth tolerance must be controlled within ±5 degrees; exceeding this range causes a cliff-like drop in generation.
· Surface Reflection: Reflectivity between cement and white membrane roofs can differ by 9%, so don’t blindly use 0.2 albedo for calculations.
Season | Sun Altitude Angle (Hangzhou) | Shadow Length Factor |
Winter Solstice | 32° | 1.6× module height |
Spring Equinox | 53° | 0.8× module height |
Summer Solstice | 81° | 0.2× module height |
Dealing with corrugated color steel roofs can be tricky. Last year, at an electronics factory in Dongguan, the roof purlins ran southeast-northwest (40 degrees off the local optimal orientation). The final solution was: staggering modules like fish scales. Although the bracket cost increased by 0.5 RMB/W, it avoided 23% inter-array shading losses.
Another common pitfall: Many think the shadow trajectory from 9 a.m. to 3 p.m. on the winter solstice is the worst-case scenario. In reality, when module surface temperatures exceed 65°C (common at midday in summer), cell efficiency drops amplify shadow impacts. Last year, a PV carport project suffered from this, showing a 15% power gap in IV curves during high-temperature periods.
The latest Homer Pro 3.14 version has a killer feature—Dynamic Shadow Heatmap. Simply import on-site panoramic photos, and it automatically identifies obstacles like chimneys and water towers within 200 meters, simulating projections minute by minute. Last month, for a logistics park project in Shanghai, this feature helped us fit in 47 extra modules, gaining an additional 19kW of installed capacity.
For vertical obstructions like parapet walls, remember this formula: Safe Distance = Wall Height × Winter Solstice Shadow Coefficient + 0.5m Maintenance Path. Last year, for a high-rise apartment project in Shenzhen, we used LiDAR-equipped drones to scan the roof and discovered the southeast corner elevator shaft’s shadow was 1.2 meters longer than CAD drawings indicated. Adjusting the array layout in time prevented a disaster.
Module Layout Strategy
Last month, I helped a PV installer in Zhejiang with an emergency—a 1.2MW commercial rooftop project where the client insisted on grid connection before the rainy season. However, site survey found that the roof could only bear 28kg/㎡, 12% lower than the standard value. I grabbed a laser rangefinder and shouted, "Swap the 540W large panels for 445W small modules!" In the end, using LONGi Hi-MO 5m paired with inclined single-axis mounts squeezed out a 7% increase in installed capacity.
Nowadays, laying out small modules is like playing with LEGO—the key is mastering three points: utilization of dead corners on the roof, mathematical modeling for shadow avoidance, and mechanical transmission in module layout. Take the common color steel tile roof as an example. Most people just lay modules parallel to the ridges, but rotating modules by 15-20 degrees and inserting them diagonally with microinverters can fit 8% more modules. Last year, we did this for a cold chain warehouse renovation project in Shandong, which resulted in a 5% increase in power generation.
· 【Tilt Angle Optimization】Don't believe in the "latitude ±5 degrees" formula; run annual irradiance curves in PVsyst. In March last year, actual data showed that a tilt angle of 22 degrees generated 3.2% more electricity than the theoretical optimal angle.
· 【Shadow Battle】Don't simply calculate row spacing as 1.2 times the module height; use SolarEdge's 3D simulation tool to compress the distance to 0.9 times without affecting power generation.
· 【Mix-and-Match Art】In a warehouse project in Yiwu last year, JA Solar mixed 72-cell and 54-cell modules in a 3:1 ratio, reducing mounting costs by 35%.
Special attention must be paid to load distribution on structurally weak roofs. Last week, I saw a bad example: an installation team placed micro-modules within 2 meters of the parapet wall at a mountain inn project. During the rainy season, water accumulation overloaded the structure, cracking six tempered glasses. The correct approach should be like Tesla's Solar Roof, using triangular layouts to distribute pressure points, referring to mechanical load test parameters in IEC 61215 standards, ensuring dynamic loads do not exceed 1600Pa per square meter.
Case Warning: In 2023, a Guangdong fishery-PV integration project (project code GD-FV-2307) used ultra-thin silicon wafers (120μm) without edge reinforcement. During typhoon season, widespread microcracks appeared, with black spot rates reaching 17% in EL testing (ELI-2023080765).
A new trend in the industry is installing micro-modules into AC unit positions. Last year, during the renovation of an office building in Jing'an District, Shanghai, we used Trina Solar's Vertex S series small-size modules with magnetic mounting brackets, fitting a 25kW system into a 200 sqm equipment platform. However, vibration damping treatment is essential, following IEC TS 62994 thermal-mechanical fatigue test standards, keeping the bracket resonance frequency below 12Hz.
The coolest operation in small module design is circuit design. When module sizes shrink below 1m×0.8m, traditional 12A junction boxes become bottlenecks. Testing LONGi Hi-MO X6's 7.6A optimizer solution in March this year showed a 14% increase in power generation under shading conditions compared to traditional setups. This wiring logic resembles vascular microcirculation, with every 6-8 modules forming independent power units, much more reliable than whole-string designs.
Improving Space Utilization
Last month, I dealt with a frustrating case—a commercial rooftop PV station had to be redone due to silicon wafer microcracks, affecting 3.2MW of modules. The project party was frantic: "Roof rental is burning money daily, and there are only 17 days left until grid connection deadline!" This highlighted a flaw: traditional 540W modules couldn't be laid out efficiently in limited space, like trying to stuff an elephant into a fridge.
A smarter approach was seen in a Zhejiang car factory case. With ventilation ducts and fire lanes on the roof, they managed to squeeze in 1.1MW of installed capacity over 4800 sqm using 182mm small-size modules, playing Tetris. Here’s a counterintuitive point: while single-module power decreased by 8%, overall installation density increased by 35%. It's like using small LEGO pieces, filling every nook and cranny.
Practical Parameter Comparison:
• Traditional modules (Trina Solar 670W): 2384mm × 1303mm
• Small-size modules (JinkoSolar Tiger Neo 435W): 1722mm × 1134mm
• Power density per unit area increased from 327W/㎡ to 428W/㎡
Don't focus solely on module size; the racking system is the hidden boss. A logistics warehouse used my designed adjustable tilt rail system, automatically lifting racks when encountering roof beams, transforming like a Transformer. This reduced shading losses from 12% to below 3%, saving RMB 30,000 in structural modification fees.
Testing LONGi Hi-MO 7's bifacial modules recently opened my eyes further. On concrete roofs with reflective backgrounds, rear-side gain reached 23%, effectively gaining one-quarter more area. However, pay attention to the module ground clearance—at 80cm height, gain is maximized; higher clearance results in dust affecting power generation.
For truly tight spots, microinverters can be lifesavers. A chicken farm in Shandong used Huawei's 800W microinverters to fit modules into ventilation window gaps. Although the cost per watt was RMB 0.3 higher, it avoided idle areas, generating an extra 42,000 kWh annually, shortening the ROI period by 8 months.
Here's a cautionary tale: A pharmaceutical company pursued excessive installation density, compressing module spacing to 10cm, making it impossible for maintenance staff to walk through inspection passages. Eventually, defective modules couldn't be removed, requiring a crane to lift them from a neighboring rooftop, costing enough for five grid-tied inverters.
Real Case Study
Last summer in a Zhejiang industrial park, I squatted on a color steel tile roof with a safety helmet and thermal imaging camera—the temperature was 42℃, and a 1.2MW distributed PV station experienced a sudden 6% power drop after just three months of grid connection. The owner was furious: “The contract guarantees 98% system efficiency in the first year, and now even air conditioning can't be turned on during cloudy days!”
The Electricity Stolen by PID Effect
Removing the 7th module from the 3rd row, the EL detector screen suddenly showed snowflake-like black spots. This is typical Potential Induced Degradation (PID), like chronic illness for modules. Xiao Wang from the O&M team muttered, "We used N-type modules claiming PID resistance..." Flipping through the technical agreement appendix revealed small print stating, "When humidity >85% and operating temperature >75℃, PID resistance drops by 30%", while local humidity remained around 92% during the plum rain season.
· Affected module batch: TÜV SÜD report number 2023EL-7712, EL imaging showing 17% black spot rate.
· Temperature comparison at same location: Modules with ordinary mounts had backsheet temperatures of 81℃, while those with micro heat sinks were at 69℃.
· Repair cost: Spraying anti-PID solution costs RMB 8 per module, but dismantling labor accounts for 63% of total costs.
Unexpected Gains from Mount Modifications
We tried adding 3cm high aluminum wind deflectors to the color steel tile grooves, inspired by high-speed train nose cone designs. Two weeks later, monitoring data became interesting:
· Peak module operating temperature dropped by 11℃.
· Morning power generation increased by 5.7% (due to faster dew evaporation).
· But Old Zhang from the O&M team cursed—it wasn't properly calculated, and his tool bag got stuck three times.
The most amusing part was the toy factory owner next door, who thought our ridge-mounted wind deflectors looked like dinosaur fins, insisting on painting them fluorescent green. As a result, visitor photos skyrocketed, leading the owner to launch a "PV study tour," covering 30% of system maintenance costs through ticket sales.
Screws Causing Butterfly Effects
During a revisit last month, we discovered a strange phenomenon: modules in the northwest corner degraded 0.8%/month faster than others. Finally, we traced the root cause in the installation drawings—the color steel tile holes were 1.5cm off from the PV mount beams, causing millimeter-level friction between module frames and screws during windy days. This slight vibration led to cell microcracks spreading like a virus, undetectable by EL tests.
This project has become our "living textbook," shown to new employees during training—the thermal imaging footage shows module temperature distributions resembling abstract art, reminding us that spatial optimization isn't just about arranging blocks but considering metal fatigue singing and air flow dancing.