Monocrystalline Solar Module Setup: 6 Point Checklist
For monocrystalline solar setups, use ≥20% efficiency modules with 25-year warranties and ±2% power tolerance. Ensure PID-resistant (<3% degradation) panels, aluminum frames (1.4mm thickness), and MC4 connectors—mount at 15-30° tilt with 1m spacing for airflow.
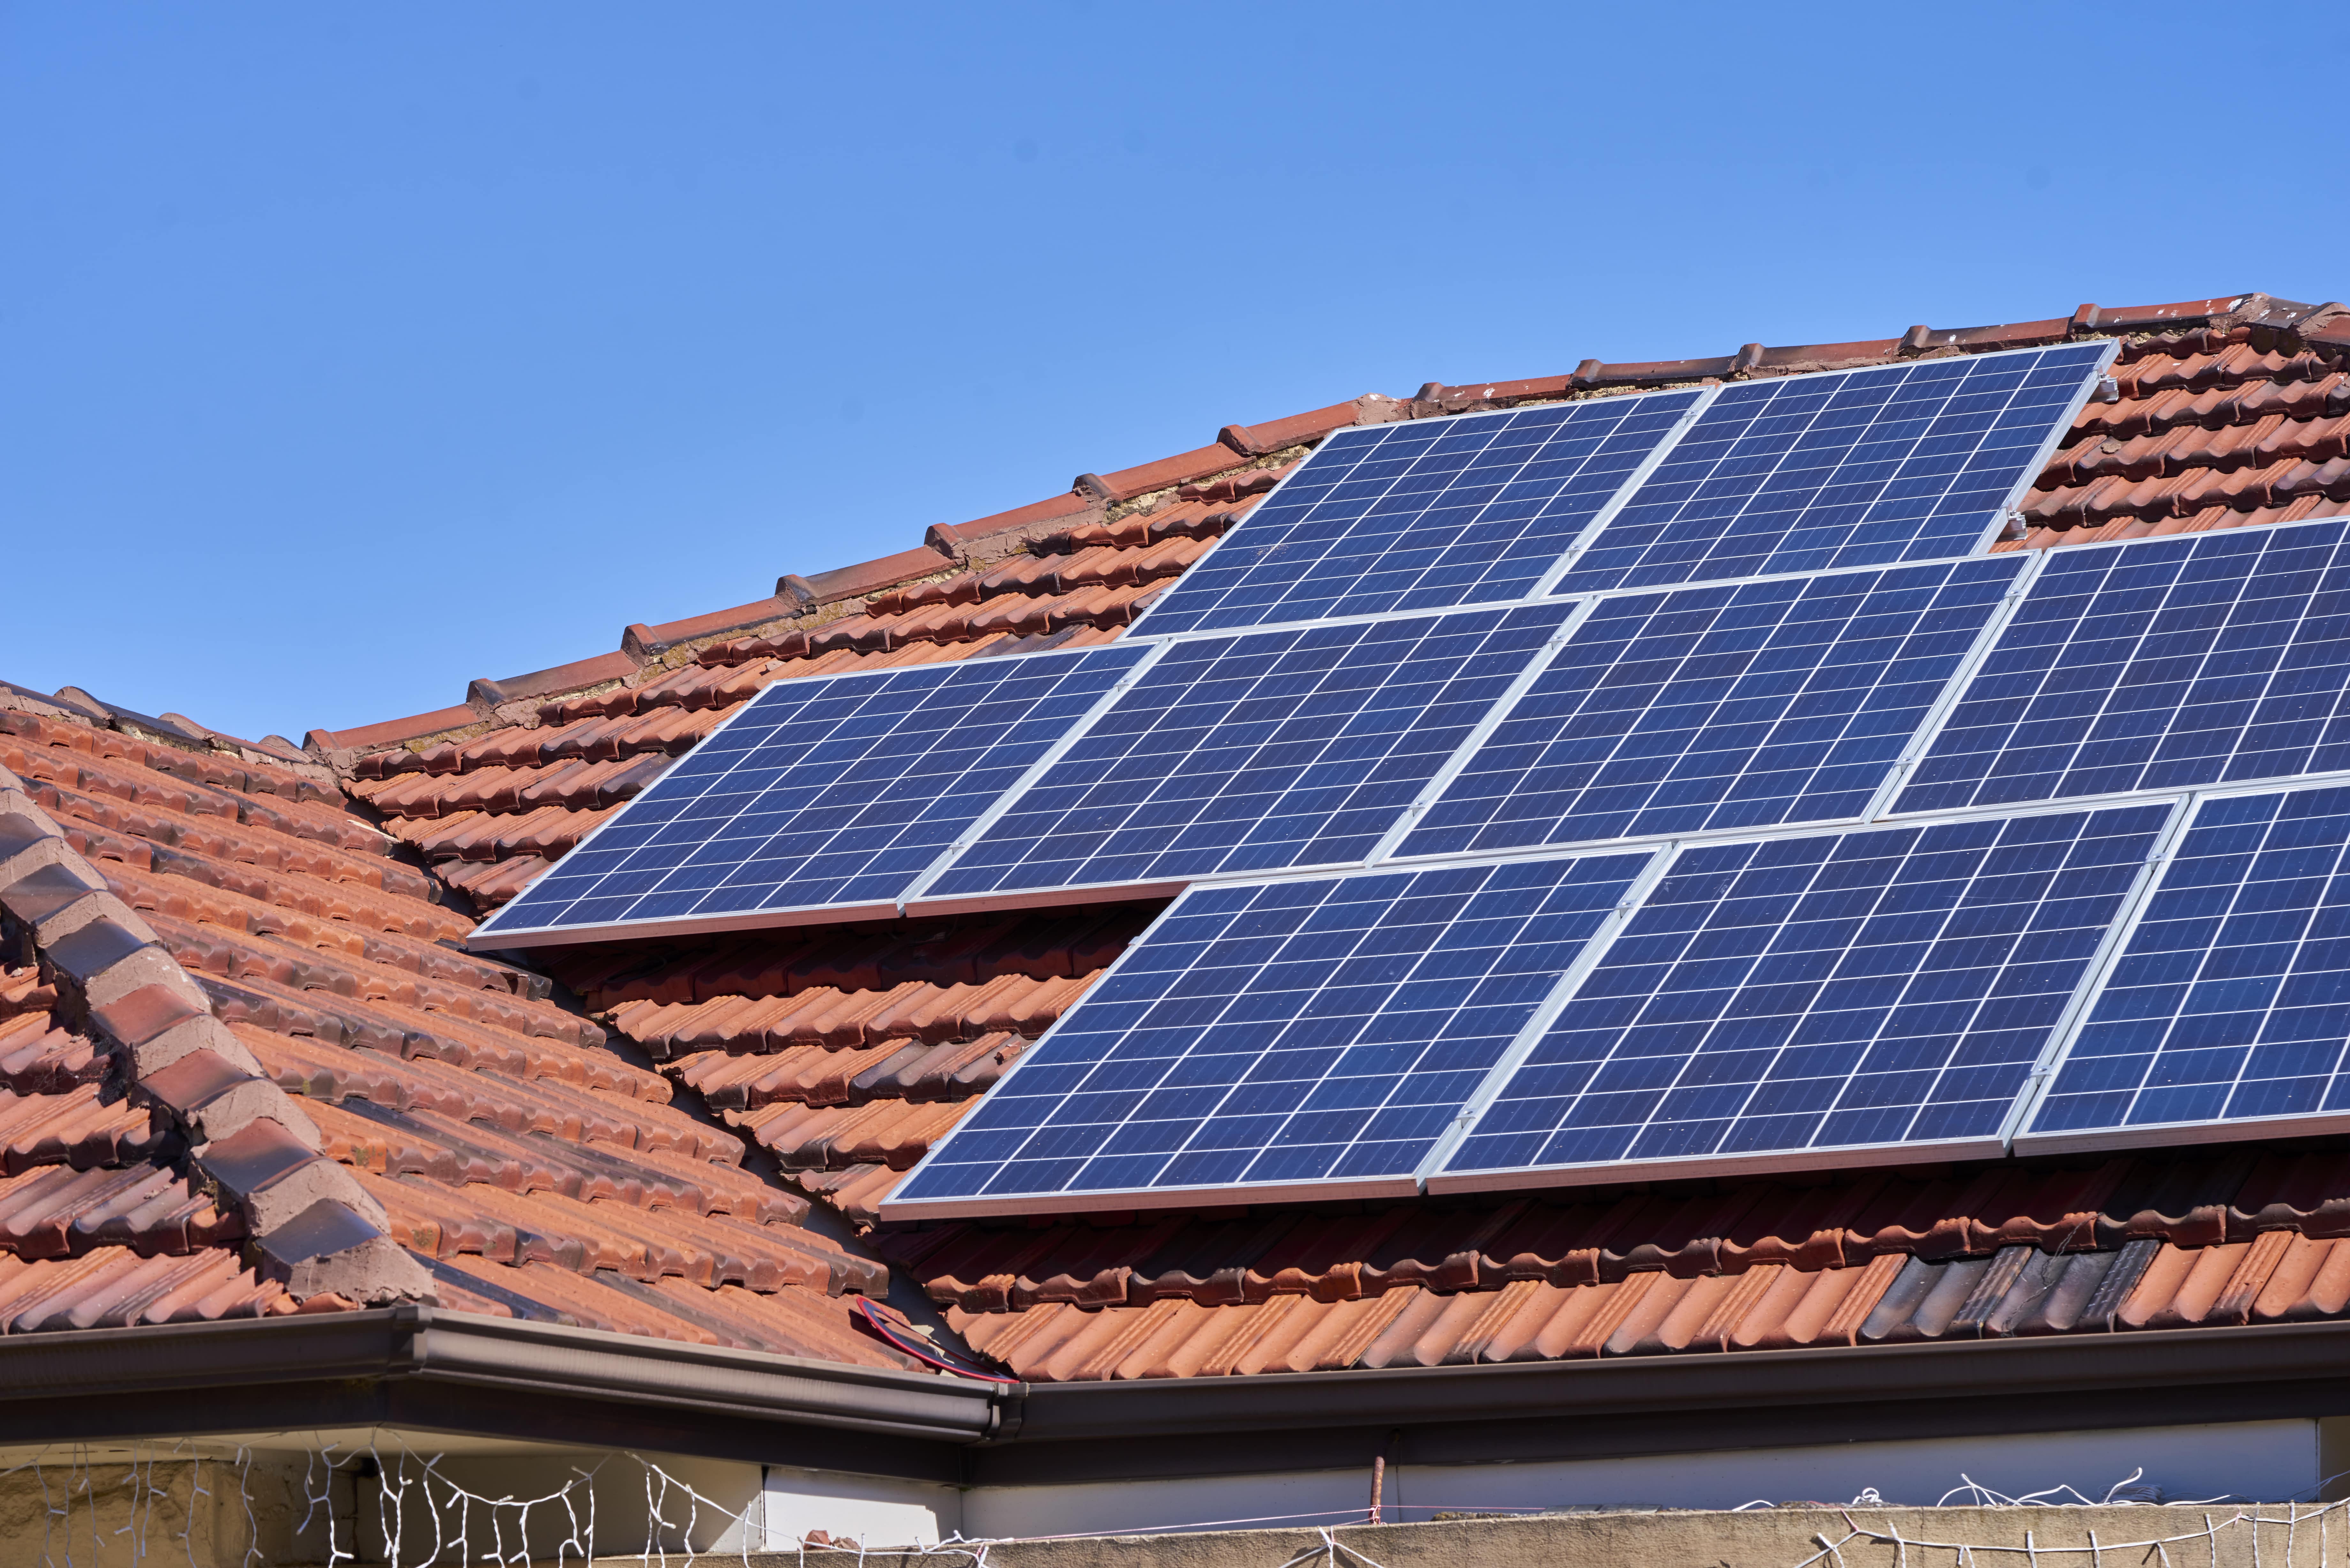
Pick the Right Location
Choosing the right spot for your monocrystalline solar panels is the single biggest factor in maximizing energy output. A poorly placed system can lose 15-25% efficiency due to shading, incorrect angle, or suboptimal orientation. In the U.S., south-facing roofs typically generate 10-20% more power than east or west-facing setups, while locations near the equator (0°-15° latitude) perform best with 0° tilt, whereas higher latitudes (40°-50°) need 30°-40° tilt for peak efficiency.
Shading is a silent killer—even 10% panel coverage from trees or chimneys can slash output by 30-50%. Use tools like Solar Pathfinder or Google Sunroof to analyze shading patterns. If your roof gets less than 4-5 hours of direct sunlight daily, consider ground-mounted systems.
Factor | Optimal Range | Impact on Efficiency |
Sunlight Hours | ≥4.5 hrs/day | Below 4 hrs = ROI drops 20%+ |
Roof Angle | Latitude ±10° | 30° tilt at 40° latitude = best annual yield |
Orientation | True South (N. Hemisphere) | 15° west of south = 5% loss |
Shading | 0% obstruction | 10% shade = 30-50% power loss |
Roof Material | Asphalt, Metal, Tile | Wood shingles = higher fire risk |
Local Weather | Low dust, moderate temps | High dust = 5-10% efficiency loss/year |
Temperature matters—monocrystalline panels lose 0.3-0.5% efficiency per 1°C above 25°C. Hot climates (35°C+) can reduce output by 10-15% unless panels have 1-2 ft air gap for cooling. Dust buildup cuts efficiency by 5-10% annually in arid regions, requiring bi-monthly cleaning.
Roof strength is critical—panels weigh 40-50 lbs per module, so ensure your roof can handle 3-4 lbs/sq ft extra load. Old roofs (15+ years) may need reinforcement (500-2,000). If your roof faces north, ground mounting (1,000-3,000 extra) may be better than forcing a 20-30% less efficient rooftop setup.
Local regulations can make or break your project. Some HOAs ban ground mounts, while cities like Phoenix require 30% roof coverage limits. Permits add 200-1,000 and 2-8 weeks delay. Always check wind load ratings—areas with 60+ mph gusts need heavy-duty racking (+200-500).
Check Mounting Hardware
Mounting hardware might seem like a small detail, but getting it wrong can cost you 500-2,000 in repairs within the first 5 years due to rust, wind damage, or structural failure. Cheap aluminum rails save 0.10 per watt upfront but corrode 3x faster in coastal areas, while galvanized steel lasts 20+ years but adds 15-20% more weight to your roof. If your racking system fails, your 15,000 solar investment could slide right off—literally.
The most common mistake is underestimating wind uplift forces. A 60 mph gust exerts 20-30 lbs/sq ft of pressure on panels, meaning a standard 6-panel array (300 sq ft) faces 6,000-9,000 lbs of lift force. Most budget rails are rated for only 50-70 mph winds, so if you live in tornado-prone regions (Oklahoma, Kansas), you need UL 2703-certified racking (+200-500) that withstands 110+ mph winds. Roof attachments matter just as much—lag bolts into wood rafters hold 200-300 lbs each, but if you hit drywall or insulation instead, pullout strength drops to 50 lbs or less. Use a stud finder or thermal camera to locate rafters, because missing just 1 out of 4 attachment points reduces wind resistance by 40%.
Thermal expansion is another silent killer. Aluminum rails expand 0.013 inches per foot for every 10°F temperature rise, so a 10-foot rail in Arizona (where temps swing 60°F daily) moves 0.8 inches per day. If bolts are over-torqued (beyond 15-20 ft-lbs), the metal fatigues and cracks within 3-5 years. Always leave 1/8-inch gaps between rail sections and use stainless steel washers ($0.50 each) to prevent galvanic corrosion.
Ground mounts have different risks. If soil isn’t compacted to 90% density, frost heave in winter can tilt poles 5-10 degrees off-axis, dropping output by 8-12%. Concrete footings should extend 4 feet deep in northern climates to avoid shifting, adding 100-300 per post. And if you skimp on hot-dip galvanizing (saving $50 per rack), rust will eat through standard coatings in 7-10 years, forcing a full replacement.
Even small hardware choices add up. Plastic end caps cost 0.25 each but block birds from nesting inside rails (a 200 cleanup job if they do). Mid-clamps should be tightened to 8-10 ft-lbs—over-tightening cracks glass panels, while under-tightening lets them shift 1-2 inches per year, wearing down wiring. And if you mix M8 and M10 bolts (a common error during DIY installs), uneven stress distribution can warp rails by 0.5 inches over 5 years, voiding warranties.
Connect Wiring Correctly
Solar wiring mistakes don’t just hurt efficiency—they can start fires. A single loose connection in a 10 kW system can generate 150°F+ heat, melting insulation and causing 3,000+ in damage before breakers trip. Nearly 30% of solar system failures in the first 5 years trace back to wiring errors, from undersized cables to reversed polarities. The difference between a 25-year trouble-free setup and a hazardous mess often comes down to 50 worth of proper connectors and 2 hours of careful work.
Factor | Specification | Risk of Deviation |
Wire Gauge | 10 AWG for ≤30A runs | 12 AWG = 12% voltage drop at 50 ft |
Max Voltage Drop | <2% for DC runs | 3% drop = 5% power loss |
Connector Type | MC4 (UL 6703 rated) | Knockoffs fail 3x faster |
Torque Specs | 25 in-lbs for MC4s | Loose = 0.5Ω resistance → 50W heat |
Conduit Fill | ≤40% capacity | 60% fill = 20°F higher temps |
Grounding | 6 AWG bare copper | Missing ground = 300% surge risk |
Wire thickness is non-negotiable. A 100 ft run of 10 AWG copper wire carries 30A with only 1.8% voltage drop, while 12 AWG loses 3.2%—enough to turn a 7,000W array into 6,650W at the inverter. In cold climates, -40°F temps make copper brittle, so stranded wire (costs $0.15/ft extra) survives 10x more flex cycles than solid core. For rooftop runs, PV wire (double-insulated, 1,000V rated) prevents arcs even when chewed by rodents—unlike cheaper THHN (50% faster degradation in UV light).
Connectors are the weak link. Cheap MC4 clones (sold for 0.50 vs. 3.50 for legit ones) corrode after 18 months in humid climates, spiking resistance from 0.1Ω to 2Ω—enough to waste 200W per 10-panel string. Always use crimping tools (75) instead of pliers; hand-crimped joints fail 40% faster under 90°F+ roof temps. For waterproofing, self-amalgamating tape (10/roll) lasts 15 years vs. 3 years for electrical tape.
Conduit mistakes are expensive. Running 3x 8 AWG wires through 1-inch EMT conduit hits 60% fill—exceeding NEC limits and trapping 35°F more heat than the allowed 40% fill. In snowy regions, buried conduit must be 18 inches deep (24 inches for high-traffic areas) or risk 500 repair bills when frost heave snaps cables. Schedule 80 PVC (2.50/ft) survives 20 years outdoors; thinner Schedule 40 cracks in 5-8 years.
Grounding is where inspectors fail you. A 6 AWG copper ground wire must connect to both racking and inverter, with <25Ω resistance to earth. Missing this adds 300V surge risk during lightning strikes. Use listed clamps ($8 each) instead of hose clamps—the latter corrodes in 2 seasons, raising resistance from 1Ω to 50Ω.
Set Proper Panel Angle
Getting your solar panel angle wrong is like leaving money on the table—literally. A 10° deviation from the optimal tilt can slash your energy output by 8-12% annually, which for a 6 kW system means losing 150-250 worth of electricity every year. In winter, panels set at a fixed summer-optimized 20° angle in Chicago (42°N latitude) will underperform by 35-45% from November to February because snow piles up and low sun angles cause glare. But tilt them up to 60°, and winter production jumps 25%, though you’ll sacrifice 10% summer efficiency.
The math is simple: your best year-round fixed angle equals your local latitude ±5°. So if you’re in Denver (40°N), 35-45° works. But if you want peak seasonal performance, adjustable racks (+200-500 per kW) let you tweak angles 2-4 times per year. Spring/Fall? Latitude –15°. Summer? Latitude –20°. Winter? Latitude +15°. This boosts annual yield by 8-12%, paying back the extra hardware cost in 4-7 years.
Snow and dust change the game. A 5° steeper tilt in snowy regions (Minnesota, Canada) helps panels self-clean, reducing snow-related losses from 30% to under 10%. But in Arizona, a 10° flatter angle minimizes dust buildup, which at 20°+ tilts can cut output by 15% monthly unless cleaned weekly. Wind matters too—angles above 45° catch 50% more wind load, requiring 20% stronger (and pricier) racking.
Roof pitch complicates things. If your roof is 20° but your ideal tilt is 40°, stacking 20° tilt mounts adds 0.10-0.15 per watt and 6-8 inches of height—which may violate local 15-inch max protrusion codes. Ground mounts avoid this but cost 0.30-0.50 more per watt.
Tracking systems ($$$) vs. fixed tilt (). Single-axis trackers (+0.50-0.80 per watt) boost output 25-35% in sunny states but add maintenance costs (100-200/year). Dual-axis systems (+1.00-$1.50 per watt) gain another 5-10% but have 12-15 moving parts that fail every 7-10 years.
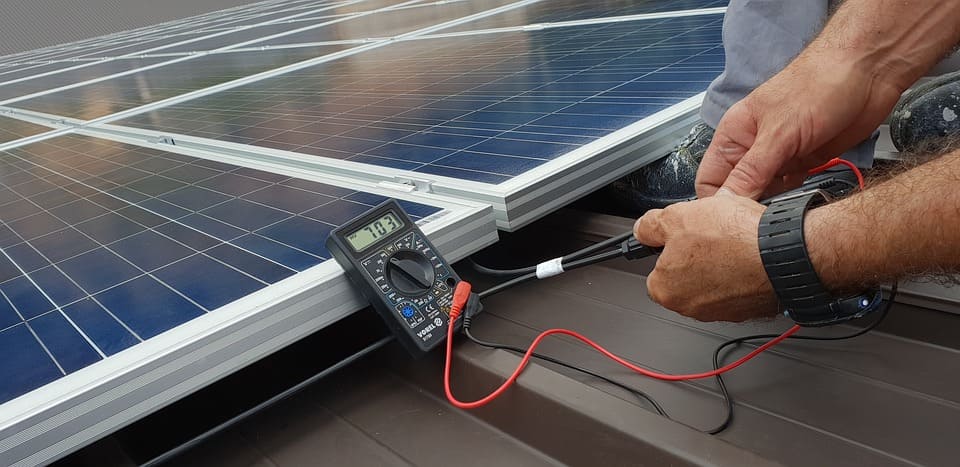
Test System Output
If you’re not testing your solar system’s output, you might as well be burning cash. A 5% underperformance in a 10 kW system equals 200-300 lost per year, and most homeowners don’t notice until they’ve wasted $1,000+ over 5 years. Worse, 1 in 3 new solar systems have at least one faulty panel or connection that drags down the whole array—but without proper testing, you’ll never know until your utility bill spikes.
Metric | Expected Range | Warning Signs | Fix Cost |
Voltage (Voc) | ±5% of panel specs | 10% drop = shading or bad wiring | 50-200 |
Current (Isc) | ±10% of datasheet | 20% lower = dirty or damaged panel | 100-500 |
Power Output | 85-105% of rated | <80% = inverter or mismatch issue | 300-1,500 |
String Balance | <5% variance | 15% difference = bypass diode failure | 150-400 |
Temperature Coefficient | -0.3%/°C to -0.5%/°C | -0.7%/°C = poor ventilation | $0 (adjust tilt) |
Start with a $150 clamp meter—measure open-circuit voltage (Voc) and short-circuit current (Isc) at solar noon. If your 400W panels read 38V instead of 42V, you’ve got 10% losses from shading, corrosion, or a failing bypass diode. Check each panel; just one underperformer in a 20-panel string can drag down output by 15-20%.
Next, log daily kWh production for a week. Cloudy days should hit 30-50% of max, but clear days must reach 90%+ of your system’s rated capacity. If your 10 kW setup averages 6 kW peak in full sun, your inverter is clipping (losing $0.20 per watt-hour) or panels are mismatched.
Thermal imaging ($300 camera rental) spots hidden issues. A 10°F+ hotspot on one panel indicates microcracks (output drops 5% per year), while a 50°F+ difference means bypass diode failure (losing 20-30% power).
Inverter data is gold. Most log per-string voltages—if String A runs 280V while String B hits 310V, you’ve got 10% imbalance from different panel ages or orientations. Fix it before it costs you $40/year in lost power.
Monitor Weather Impact
Weather doesn’t just affect your weekend plans—it makes or breaks your solar ROI. A single heavy snowstorm can drop daily production to 0 kWh, while consistent 95°F+ temps in Arizona slash panel efficiency by 12-18% due to heat soak. Even light haze (thin clouds) reduces output by 15-25%, and if you’re not tracking these patterns, you might mistake weather losses for system failures, wasting $500+ on unnecessary repairs.
"In Denver, a 3-inch snowfall wipes out 100% of solar output for 1-3 days—but panels angled at 50°+ shed snow 80% faster, cutting downtime by half."
Weather Impact Data & Mitigation
Condition | Power Loss | Recovery Time | Fix Cost |
Heavy Snow (4+ inches) | 100% | 2-5 days | $0 (self-clears) |
Extreme Heat (95°F+) | 10-18% | Immediate (night cooling) | $200 (add ventilation) |
Dust Storm | 20-40% | 1-2 days (or cleaning) | $50 (water wash) |
Cloudy/Hazy | 15-30% | 1-3 hours (if clouds pass) | $0 (weather-dependent) |
High Winds (50+ mph) | 5-10% (soiling loss) | Until wind stops | $300 (racking inspection) |
Heat is a silent thief. For every 1°F above 77°F, monocrystalline panels lose 0.3-0.5% efficiency. In Phoenix summers (110°F avg.), that’s a 10-15% performance hit—costing a 10 kW system $250/year in lost power. Mitigation? Install panels 6+ inches above roof for airflow, or add white reflective roofing (lowers temps 10-15°F).
Snow requires strategy. A 20° tilted array in Michigan holds 8-12 inches of snow for 3-7 days, while a 45° tilt sheds it in 1-2 days. If you can’t adjust tilt, a $100 roof rake clears panels in 30 mins, but beware—scratched glass cuts output 2-3% permanently.
Dust and pollen build up fast. In California’s Central Valley, 2 weeks without rain creates 5-8% efficiency loss from dust. A 50 garden hose rinse restores 95% of output, but hard water leaves mineral stains (1-2% loss per year). For arid regions, automated cleaning systems (500-$2,000) pay back in 3-5 years.
Wind damages more than you think. Gusts over 60 mph can flex panels 0.5-1 inch, loosening connections over time. After storms, check:
· Torque on racking bolts (should be 20-30 ft-lbs)
· MC4 connectors (no 1/4-inch gaps)
· Roof penetrations (no water stains inside attic)